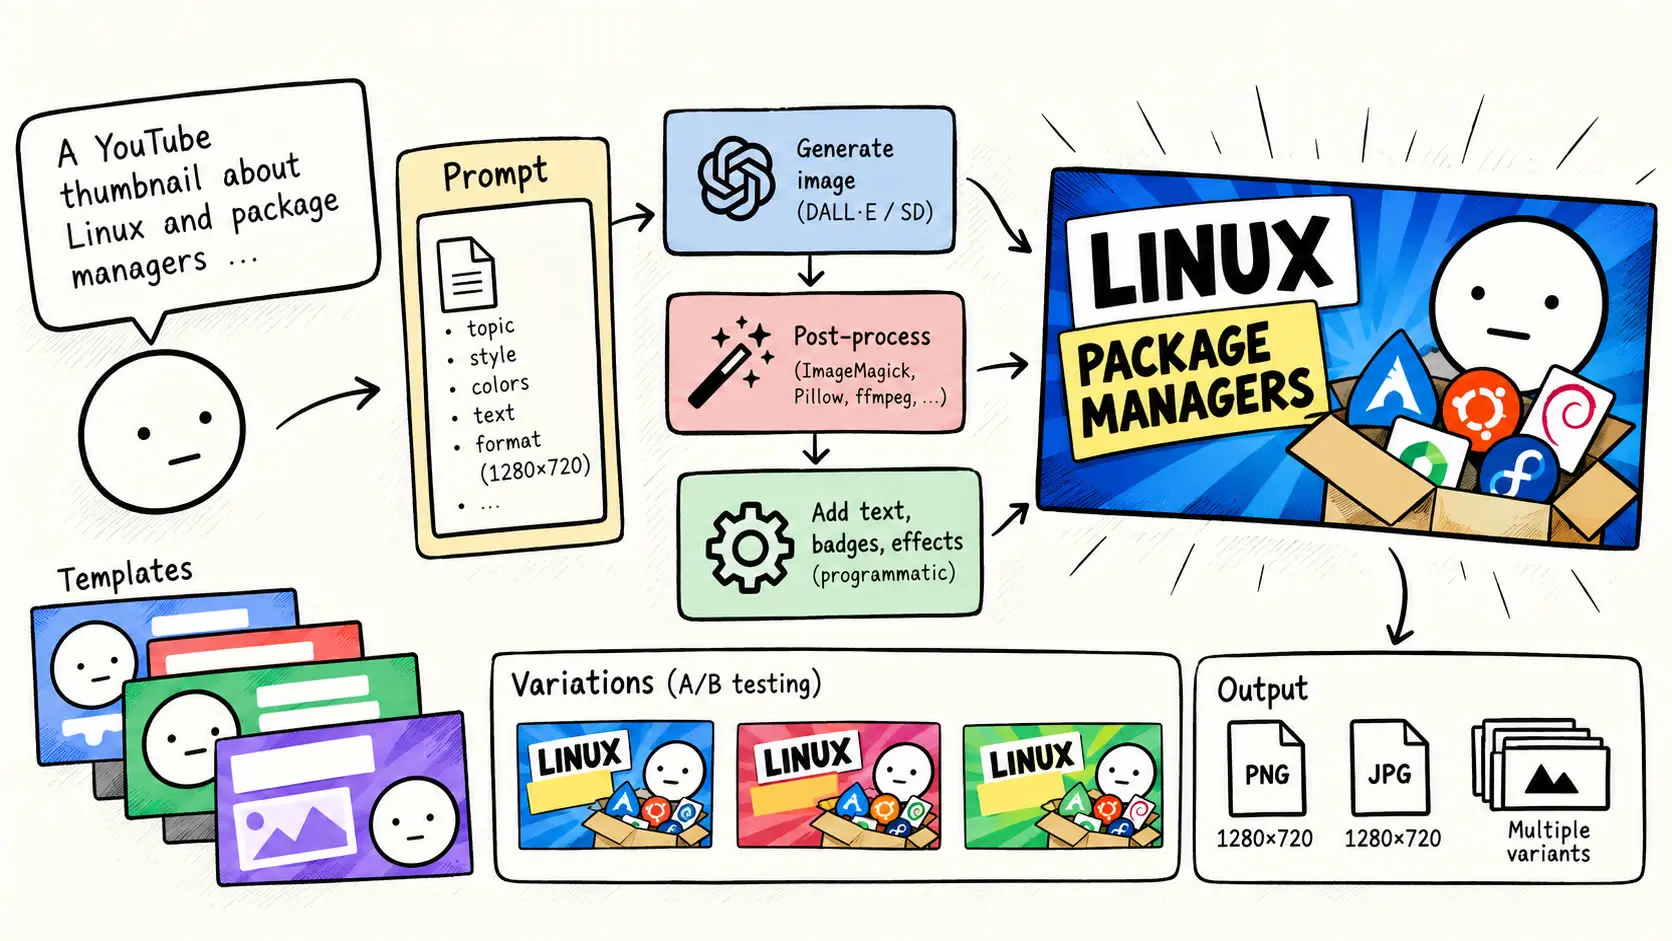
Following up on my YouTube channel creation from the previous article, on Mon. 25 May 2026 14:02:06 CEST, I wanted to write a program to automate the generation of my thumbnails.
Since my face will be shown on my YouTube channel, i've studied YouTubers thumbnails that have their face visible, such as LowLevel.
Anatomy of YouTube Thumbnails
And I came to the following conclusion:
The composition is simple -> arround 3 or 4 elements
-
The Background -> minimalistic enough, just one color tone
-
The upper body with (shoulders + face) -> The viewer sees the creator’s face before clicking, so the video feels less surprising once it starts. In theory, that can help retention.
Note that we do not want the PNG of the YouTuber upper body + face beeing horizontally cropped -> bad integration.
- Exaggerated facial expression: shock, confusion, desperation, or curiosity.
Note that the YouTuber's PNG must not take more than 1/3 of the space (especially horizontal space)
The PNG is often placed on the right, with the YouTuber looking left, towards the title.
-
The title (monochromatic)
-
When the Topic is about a company we add the logo above the title, if we can update the title font / color with the Logo + Thematic that's great !
That's basically all, but for me i wanted to add the logo of my YouTube channel in small at the top left of each video.
Novelty and Identity
First, the composition of thumbnails on a YouTube channel should not differ too much from one video to another.
We can keep the same composition and/or color sheme.
Some creators change the color identity, which is fine: it helps the viewer immediately understand that this is a new video.
But in my opinion, changing the title and the YouTuber PNG is already enough to express novelty.
That's what I'll do.
Prepare a dozen PNGs of myself with different expressions, adapted to the subject.
But keep a rotation of PNGs to preserve novelty.
And I’ll keep the same composition, background, title font, and title color to preserve the channel identity.
You know what ?
I'll keep the exact same T-Shirt for the PNGs and the time when I'll record a video.
Uploading Selfies onto my computer with a tiny Go server
Alright, let's create a Go HTTP server that handles file upload :)
package main
import (
"fmt"
"io"
"log"
"net/http"
"os"
"path/filepath"
"time"
)
const uploadDir = "uploads"
// 2 GB max upload size
const maxUploadSize = 2 << 30
func main() {
if err := os.MkdirAll(uploadDir, 0755); err != nil {
log.Fatal(err)
}
http.HandleFunc("/", uploadPage)
http.HandleFunc("/upload", uploadHandler)
log.Println("Server running on http://0.0.0.0:8080")
log.Fatal(http.ListenAndServe(":8080", nil))
}
func uploadPage(w http.ResponseWriter, r *http.Request) {
html := `
<!DOCTYPE html>
<html>
<head>
<meta charset="UTF-8">
<title>Upload Video</title>
</head>
<body>
<h1>Upload a file</h1>
<form method="POST" action="http://192.168.1.20:8080/upload" enctype="multipart/form-data">
<input type="file" name="file" accept="video/*,image/*" required>
<button type="submit">Upload</button>
</form>
</body>
</html>
`
w.Header().Set("Content-Type", "text/html; charset=utf-8")
fmt.Fprint(w, html)
}
func uploadHandler(w http.ResponseWriter, r *http.Request) {
log.Println("Upload request received")
if r.Method != http.MethodPost {
http.Error(w, "Method not allowed", http.StatusMethodNotAllowed)
return
}
r.Body = http.MaxBytesReader(w, r.Body, maxUploadSize)
if err := r.ParseMultipartForm(maxUploadSize); err != nil {
log.Println("ParseMultipartForm error:", err)
http.Error(w, "File too large or invalid upload", http.StatusBadRequest)
return
}
file, header, err := r.FormFile("file")
if err != nil {
log.Println("FormFile error:", err)
http.Error(w, "Could not read uploaded file", http.StatusBadRequest)
return
}
defer file.Close()
log.Printf("Receiving file: %s, size: %d bytes\n", header.Filename, header.Size)
filename := filepath.Base(header.Filename)
// Add timestamp to avoid overwriting files with same name
finalName := fmt.Sprintf("%d_%s", time.Now().Unix(), filename)
dstPath := filepath.Join(uploadDir, finalName)
dst, err := os.Create(dstPath)
if err != nil {
log.Println("os.Create error:", err)
http.Error(w, "Could not create file on server", http.StatusInternalServerError)
return
}
defer dst.Close()
written, err := io.Copy(dst, file)
if err != nil {
log.Println("io.Copy error:", err)
http.Error(w, "Could not save file", http.StatusInternalServerError)
return
}
log.Printf("Saved file: %s (%d bytes)\n", dstPath, written)
fmt.Fprintf(w, "File uploaded successfully: %s\nSize: %d bytes\n", finalName, written)
}
The thing when receiving a file in go is:
- writing with a limit the raw data from the HTTP POST request (
method="POST") with:
r.body = http.MaxBytesReader(w, r.Body, maxUploadSize)
- Parsing the multipart form so Go can distinguish the uploaded resources:
if err := r.ParseMultipartForm(maxUploadSize); err != nil {
log.Println("ParseMultipartForm error:", err)
http.Error(w, "File too large or invalid upload", http.StatusBadRequest)
return
}
- And now we are able to use
r.FormFile()method to select the"file"content by its name, which is defined here in the client:
<input type="file" name="file" accept="video/*,image/*" required>
We do it here:
file, header, err := r.FormFile("file")
At this point file is an object behaving like a file stream containing the raw data of the file, and header is a little struct containing metadata, like the filename, size, content-type...
Example:
fmt.Println(header.Filename)
fmt.Println(header.Size)
fmt.Println(header.Header.Get("Content-Type"))
That's why we'll close the file connection with defer file.Close().
- Extract the filename
Simple enough, we just use filepath.Base(header.Filename).
Example:
filepath.Base("AA/BB.txt")
-> "BB.txt"
- Ensuring uniqueness of the filename.
finalName := fmt.Sprintf("%d_%s", time.Now().Unix(), filename)
dstPath := filepath.Join(uploadDir, finalName)
"uploads/filename_SECS1STJANUARY1970"
- Creating the destination file.
dst, err := os.Create(dstPath)
if err != nil {
log.Println("os.Create error:", err)
http.Error(w, "Could not create file on server", http.StatusInternalServerError)
return
}
defer dst.Close()
- Finally copying the content to permanent file.
We use io.Copy(dst, src), its signature is:
func Copy (dst Writer, src Reader) (writen int64, err error)
We use it here:
written, err := io.Copy(dst, file)
if err != nil {
log.Println("io.Copy error:", err)
http.Error(w, "Could not save file", http.StatusInternalServerError)
return
}
And forward a success response to the client:
fmt.Fprintf(w, "File uploaded successfully: %s\nSize: %d bytes\n", finalName, written)
So now i just have to:
> go run main.go
2026/05/25 15:51:51 Server running on http://0.0.0.0:8080
And now connect to my local network computer IP with my SmartPhone.
We can find my computer IP in the local network with ip addr
❯ ip addr
1: lo: <LOOPBACK,UP,LOWER_UP> mtu 65536 qdisc noqueue state UNKNOWN group default qlen 1000
link/loopback 00:00:00:00:00:00 brd 00:00:00:00:00:00
inet 127.0.0.1/8 scope host lo
valid_lft forever preferred_lft forever
inet6 ::1/128 scope host noprefixroute
valid_lft forever preferred_lft forever
2: enp7s0: <NO-CARRIER,BROADCAST,MULTICAST,UP> mtu 1500 qdisc fq_codel state DOWN group default qlen 1000
link/ether fc:34:97:67:a8:93 brd ff:ff:ff:ff:ff:ff
3: wlp6s0: <BROADCAST,MULTICAST,UP,LOWER_UP> mtu 1500 qdisc noqueue state UP group default qlen 1000
link/ether 70:9c:d1:62:92:3d brd ff:ff:ff:ff:ff:ff
inet 192.168.1.20/24 brd 192.168.1.255 scope global dynamic noprefixroute wlp6s0
valid_lft 65629sec preferred_lft 65629sec
inet6 2a01:cb00:125c:ef00:f791:46ce:28f3:a51e/64 scope global temporary dynamic
valid_lft 86259sec preferred_lft 459sec
inet6 2a01:cb00:125c:ef00:1e87:5f78:e039:8e92/64 scope global dynamic mngtmpaddr noprefixroute
valid_lft 86259sec preferred_lft 459sec
inet6 fe80::15e1:d82f:2d5e:b8a0/64 scope link noprefixroute
valid_lft forever preferred_lft forever
4: docker0: <NO-CARRIER,BROADCAST,MULTICAST,UP> mtu 1500 qdisc noqueue state DOWN group default
link/ether 3a:b3:bf:71:b7:3d brd ff:ff:ff:ff:ff:ff
inet 172.17.0.1/16 brd 172.17.255.255 scope global docker0
valid_lft forever preferred_lft forever
5: br-83d249e18dae: <NO-CARRIER,BROADCAST,MULTICAST,UP> mtu 1500 qdisc noqueue state DOWN group default
link/ether 5a:9e:c1:43:a3:1e brd ff:ff:ff:ff:ff:ff
inet 172.18.0.1/16 brd 172.18.255.255 scope global br-83d249e18dae
valid_lft forever preferred_lft forever
These are all network interfaces.
They show the address my computer has on each network.
For example on docker network, my computer has address 172.17.0.1.
What interests us here is the wireless interface wlp6s0.
Where my address is 192.168.1.20.
But what is the /24 ?
This is a mask applied to the ip adress range format for this network, meaning that the 24 first bits are set to 1.
An IPV4 adress is 4 bytes, one byte can represent 256 states -> 0 to 255, that is why IPV4 has this format:
[0, 255].[0, 255].[0, 255].[0, 255]
In this case, /24 means the first 24 bits are the network part.
In dotted decimal notation, the subnet mask is 255.255.255.0 (underlying bits are 11111111).
So we got only 256 possibles computers, phones... connected on the local network.
Also, a mask value can be anywhere between 0 and 32, meaning that in IPV4 the bytes are not uncuttable.
So here on my phone i just type the address http://192.168.1.20:8080 and uploads a bunch of pictures of me with interrogating face.
Our good friend imagemagick
In ImageMagick 6, the command is usually convert. In ImageMagick 7, the recommended command is magick, but on my system I’m using the legacy convert command.
We install it:
> sudo apt install imagemagick
In this article i use this version:
❯ convert -version
Version: ImageMagick 6.9.12-98 Q16 x86_64 18038 https://legacy.imagemagick.org
Copyright: (C) 1999 ImageMagick Studio LLC
License: https://imagemagick.org/script/license.php
Features: Cipher DPC Modules OpenMP(4.5)
Delegates (built-in): bzlib djvu fftw fontconfig freetype heic jbig jng jp2 jpeg lcms lqr ltdl lzma openexr pangocairo png raw tiff webp wmf x xml zlib
juju@juju-System-Product-Name ~/simple_uploader/uploads
Now, convert can work for cutting yourself out only if the background is uniform enough and you stand out clearly from it.
Example with this cat picture:
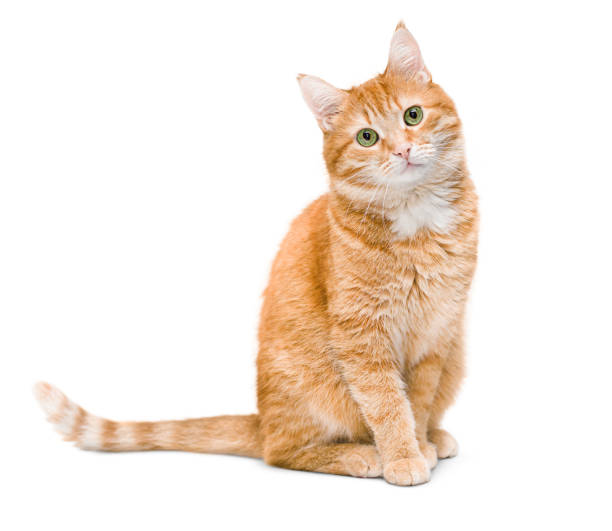
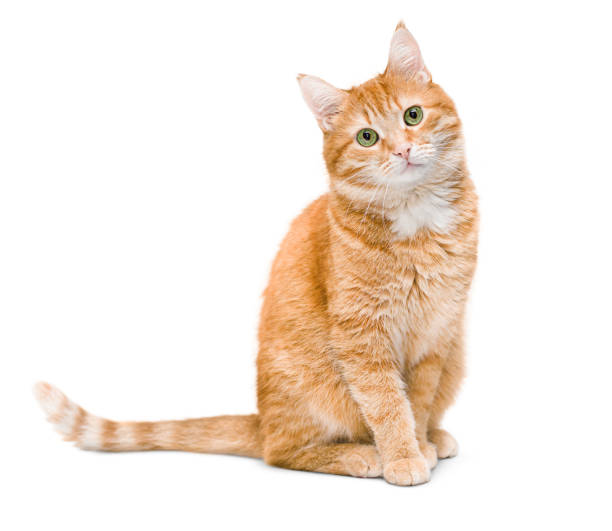
> convert cat1.jpg -fuzz 10% -transparent white cat2.png
And we got:
Now let's dissect the command.
-
-transparent whitemeans set the alpha channel (channel that controls the transparancy of the pixel) to 0 (transparent) for all the pixel you consider white -
-fuzz 10%means with a 10% tolerance
At first i thought the distance between the reference color point, which is white OR (R: 255, G:255, B:255) here was computed the following:
(255 - Rpix) + (255 - Gpix1) + (255 - Bpix1)
Then for example:
(255 - 251) + (255 - 249) + (255 - 254) = 11
And because the maximum distance would be 255 * 3 = 765.
11 / 765 = 0.01419355
Which is below the maximum tolerance value, hence it is considered white so itts alpha channel is set to 0 -> appears transparent.
This is a normalized Manhattan distance.
But in fact it is computed as a vectorial distance.
That is a distance in a space.
In this case a 3 dimensional space, each dimension is a color (R, G or B).
So we do:
sqrt((255 - 251) ^ 2 + (255 - 249) ^ 2 + (255 - 254) ^ 2)
That is just Pythagorean Theorem extended to 3 dimensions.
Like take a cube for example, you know the sides (A, B, C) are 1 meters long for example and you want to compute the length of the diagonal between the 2 most distant apex. (E)
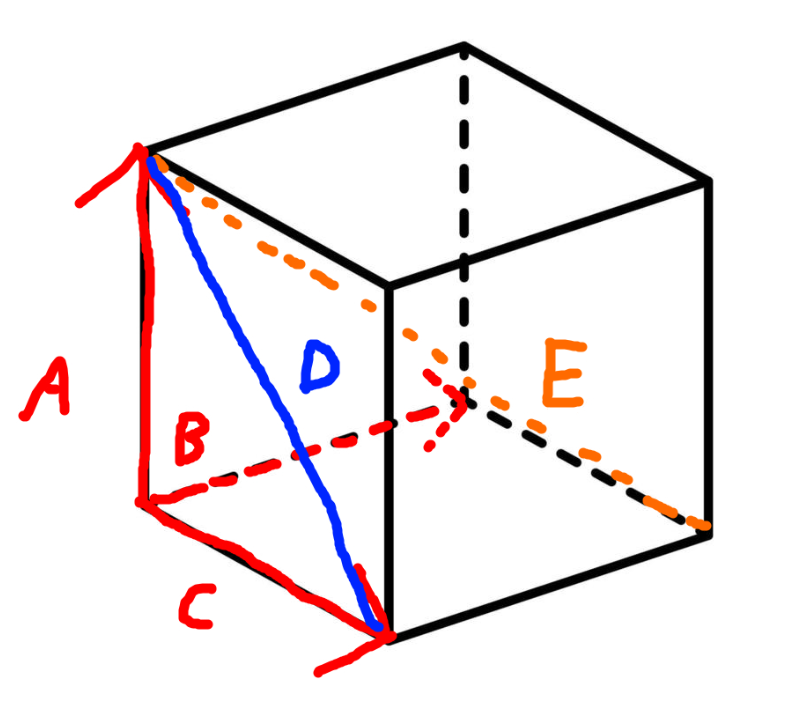
So you first compute the length of a diagonal that is shared between 2 dimensons (D), which is in fact same length as (D').
sqrt(A^2 + C^2)
Then you use this diagonal with (A) (equivalent to (A')) to determine the length of the diagonal (E).
So in fact we got:
Length of E = sqrt( sqrt(A^2 + C^2)^2 + B^2)
=>
Length of E = sqrt( A^2 + C^2 + B^2)
But in general case we are not in a cube because distance values differes, but the idea is the same, we must use all sides and we can not simplify like in a cube for example to:
Length of E = sqrt( A^2 + A^2 + A^2)
=>
Length of E = sqrt( 3 * A^2)
What i find funny about that is that order of diagonal computation does not matter because in the end all is just side A + side B + side C
So here:
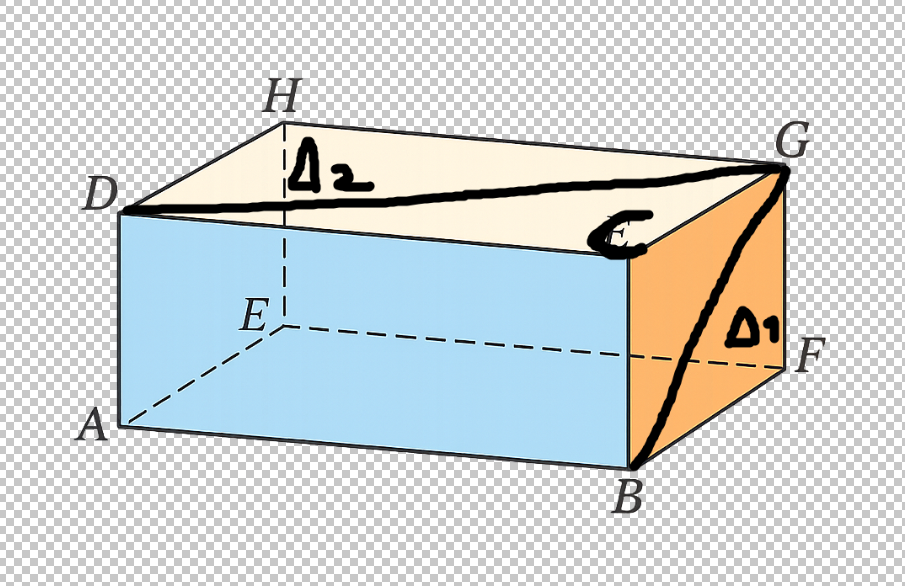
We can say that (GA) is (FE)^2 + DELTA_1^2 which is not intuitive at all.
Instead of stating sqrt(((FB)^2 + (FE)^2))^2 + FG^2 which is more intuitive.
Going back to the example.
sqrt((255 - 251) ^ 2 + (255 - 249) ^ 2 + (255 - 254) ^ 2) = 7.28
And we divide by the maximum.
7.28 / sqrt(3 * 255^2)
<=>
7.28 / 441.67 = .016 -> 1.6 %
We are below 10%, so the pixel is considered white, hence its alpha channel is set to 0 -> transparent.
Adding halo
Now, we want to add a halo around the PNG.
For that we will use:
> convert cat2.png \( +clone -background "#00eaff" -shadow 100x12+0+0 \) +swap -background none -layers merge +repage cat_halo.png
It produces something like:
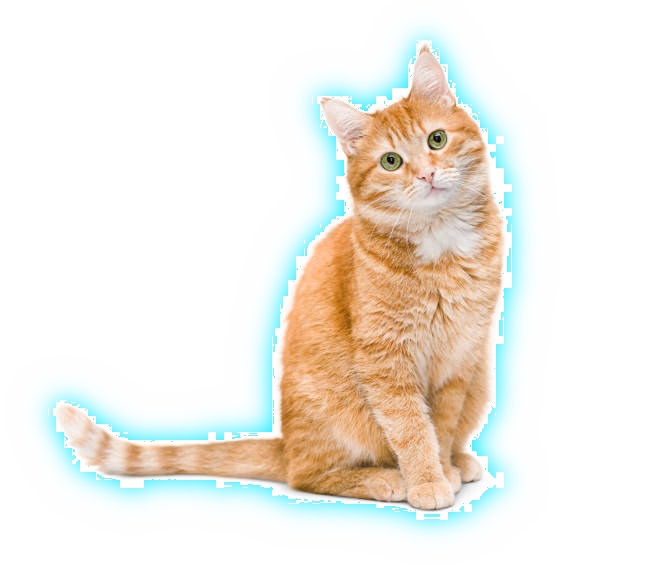
Because it takes the initial PNG cat2.png, and enters in a sub-pipeline we define between parenthesis ( and ) -> to make them interpretable by imagemagick and not bash we escape them with \.
In this pipeline we wil bring cat2.png by cloning it inside the pipeline with +clone.
And we define background color, this is just the color that will be used for the next command -> Cyan (halo)
Speaking of halo, just after we have -shadow 100x12+0+0.
This in fact creates a shadow based on the dimensions of the pixels that are not transparent.
We define the coordinates of the shadow as ...+0+0 -> meaning no x and y shift respectively from the shape we make the shadow from.
The opacity is 100 which is for 100%.
And 12 is the blur radius/sigma-like value used to spread the shadow. (shadow diffuson)
If we increase it to 100 for example:
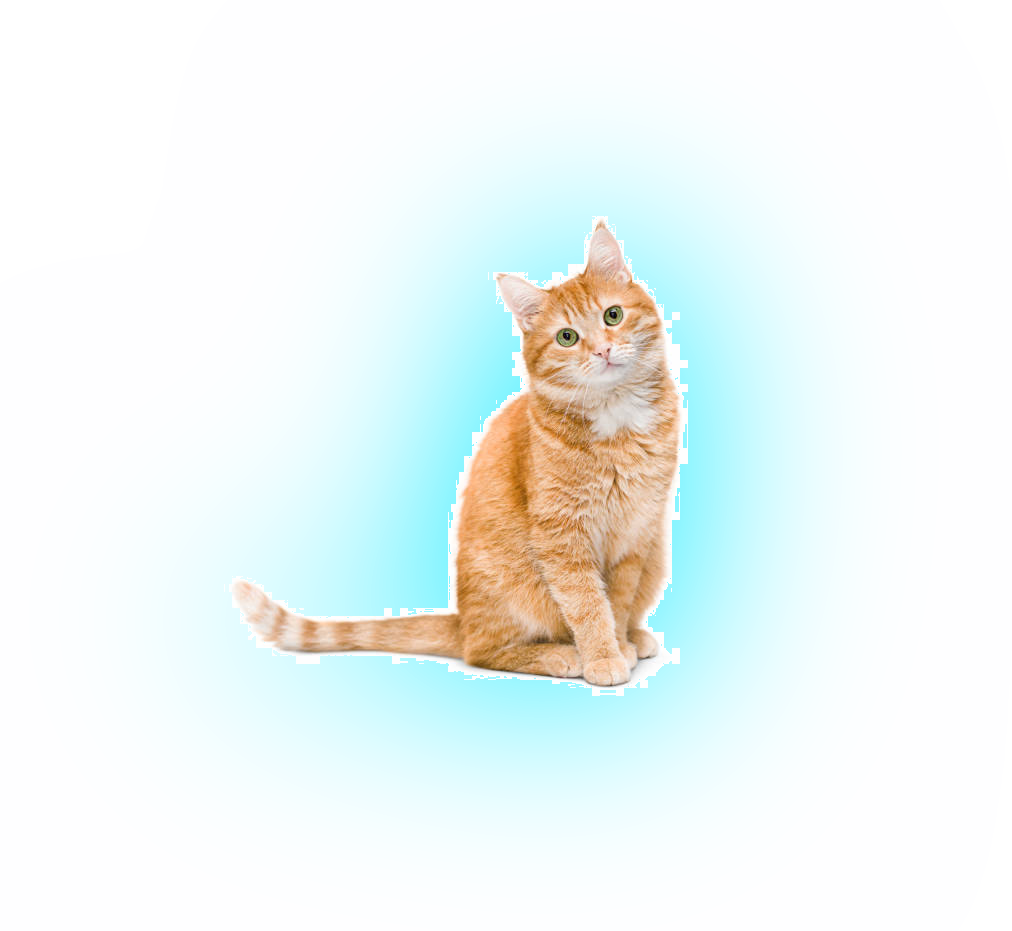
Now when we go outside of the sub-pipeline, the image that is generated is just a cyan shadow:

And in imagemagick we reason in term of a stack of images, so at this point we got this image stack:
shadow_image
cat2.png
But because we want a halo, it means that we want the original PNG to be paced above the shadow, so we swap the stack with +swap.
After that, we just make explicit that the background must still be transparent with -background transparent equivalent to -background none in th merge step.
Finally we merge the images of the stack with -layers merge (last stack image onto the first image stack).
Ha and what about the +repage ?
In fact PNG can have an optional chunk containing x and y offsets of the image.
Here, in the shadow step, because shadow is a little larger than the shape it's derived from to create the holow effect then imagemagick could have put some x and/or y offsets in the image optional buffer (here it is unlikely because the halo width (sigma value) is not high and the x and y offsets are equal to 0).
But still good practice to put +repage if we want the canva to perfectly fit the output image dimensions.
Hmm, but it appears that the merge step will adjust the dimensions of the output image (because of halo width, width and height (of the output image) will slightly increase).
So here it is even more unlikely to have offsets because merge will adjust output dimensions -> virtual canvas and visible image dimensions are equal.
FFmpeg is all we need
So now we are going to combine the images.
Here is the FFmpeg version i use for this article:
ffmpeg version 6.1.1-3ubuntu5 Copyright (c) 2000-2023 the FFmpeg developers
built with gcc 13 (Ubuntu 13.2.0-23ubuntu3)
configuration: --prefix=/usr --extra-version=3ubuntu5 --toolchain=hardened --libdir=/usr/lib/x86_64-linux-gnu --incdir=/usr/include/x86_64-linux-gnu --arch=amd64 --enable-gpl --disable-stripping --disable-omx --enable-gnutls --enable-libaom --enable-libass --enable-libbs2b --enable-libcaca --enable-libcdio --enable-libcodec2 --enable-libdav1d --enable-libflite --enable-libfontconfig --enable-libfreetype --enable-libfribidi --enable-libglslang --enable-libgme --enable-libgsm --enable-libharfbuzz --enable-libmp3lame --enable-libmysofa --enable-libopenjpeg --enable-libopenmpt --enable-libopus --enable-librubberband --enable-libshine --enable-libsnappy --enable-libsoxr --enable-libspeex --enable-libtheora --enable-libtwolame --enable-libvidstab --enable-libvorbis --enable-libvpx --enable-libwebp --enable-libx265 --enable-libxml2 --enable-libxvid --enable-libzimg --enable-openal --enable-opencl --enable-opengl --disable-sndio --enable-libvpl --disable-libmfx --enable-libdc1394 --enable-libdrm --enable-libiec61883 --enable-chromaprint --enable-frei0r --enable-ladspa --enable-libbluray --enable-libjack --enable-libpulse --enable-librabbitmq --enable-librist --enable-libsrt --enable-libssh --enable-libsvtav1 --enable-libx264 --enable-libzmq --enable-libzvbi --enable-lv2 --enable-sdl2 --enable-libplacebo --enable-librav1e --enable-pocketsphinx --enable-librsvg --enable-libjxl --enable-shared
WARNING: library configuration mismatch
avcodec configuration: --prefix=/usr --extra-version=3ubuntu5 --toolchain=hardened --libdir=/usr/lib/x86_64-linux-gnu --incdir=/usr/include/x86_64-linux-gnu --arch=amd64 --enable-gpl --disable-stripping --disable-omx --enable-gnutls --enable-libaom --enable-libass --enable-libbs2b --enable-libcaca --enable-libcdio --enable-libcodec2 --enable-libdav1d --enable-libflite --enable-libfontconfig --enable-libfreetype --enable-libfribidi --enable-libglslang --enable-libgme --enable-libgsm --enable-libharfbuzz --enable-libmp3lame --enable-libmysofa --enable-libopenjpeg --enable-libopenmpt --enable-libopus --enable-librubberband --enable-libshine --enable-libsnappy --enable-libsoxr --enable-libspeex --enable-libtheora --enable-libtwolame --enable-libvidstab --enable-libvorbis --enable-libvpx --enable-libwebp --enable-libx265 --enable-libxml2 --enable-libxvid --enable-libzimg --enable-openal --enable-opencl --enable-opengl --disable-sndio --enable-libvpl --disable-libmfx --enable-libdc1394 --enable-libdrm --enable-libiec61883 --enable-chromaprint --enable-frei0r --enable-ladspa --enable-libbluray --enable-libjack --enable-libpulse --enable-librabbitmq --enable-librist --enable-libsrt --enable-libssh --enable-libsvtav1 --enable-libx264 --enable-libzmq --enable-libzvbi --enable-lv2 --enable-sdl2 --enable-libplacebo --enable-librav1e --enable-pocketsphinx --enable-librsvg --enable-libjxl --enable-shared --enable-version3 --disable-doc --disable-programs --disable-static --enable-libaribb24 --enable-libopencore_amrnb --enable-libopencore_amrwb --enable-libtesseract --enable-libvo_amrwbenc --enable-libsmbclient
libavutil 58. 29.100 / 58. 29.100
libavcodec 60. 31.102 / 60. 31.102
libavformat 60. 16.100 / 60. 16.100
libavdevice 60. 3.100 / 60. 3.100
libavfilter 9. 12.100 / 9. 12.100
libswscale 7. 5.100 / 7. 5.100
libswresample 4. 12.100 / 4. 12.100
libpostproc 57. 3.100 / 57. 3.100
All we need is this FFmpeg command:
#!/usr/env/bash
ffmpeg -i background/background.png -i me/me4.png -i logo_blue.png \
-filter_complex "
[0:v]scale=1920:1080[bg];
[1:v]scale=-1:1080[me];
[2:v]scale=-1:144[logo];
[bg][me]overlay=W-w+80:H-h+140[withme];
[withme]drawtext=
fontfile=/usr/share/fonts/truetype/jetbrains-mono/JetBrainsMono-Bold.ttf:
textfile=title.txt:
fontcolor=blue:
fontsize=108:
line_spacing=12:
x=120:
y=(h-text_h)/2:
shadowcolor=black@0.65:
shadowx=7:
shadowy=7[prefinal];
[prefinal][logo]overlay=40:40;
" \
-frames:v 1 thumbnail.png
Technically the flow is simple enough.
First you see that we take multiple inputs, the background, the PNG (me) and the logo.
Then in the filter space we can grab them.
Indicating their argument position in the file input [0:v] -> takes background/background.png for example.
And on each one of this pictures we perform scaling operations.
For example we enforce the background to be 1920x1080.
And when it comes to the other images, we scale their height to 1080 and 144 pixels respectively enforcing to respect their ratio, with the -1 as the width.
Meaning that their width is recomputed according to their scaled height and their ratio -> ratio conserved
We give them a name after each operation, bg, me, logo respectively.
Here:
[bg][me]overlay=W-w+80:H-h+140[withme];
We put me onto bg.
The engine begin to draw it at W-w+80.
-
W= background width -> 1920 -
w= PNG width
And we got the same concept for the height.
We can approximately visualize the x coordinates from which it begins to draw the PNG here:
w
|
|
X V
--------------------->
| | |
| | | <---- h
| X-------|Y
| |
| |
| |
|-------------------|
V
Now, when it comes to the title, we put it at the center.
x=120 pixels from the left.
And y is the height of the textable area divided by 2 -> half height.
The shadow is attached to the text, so it begins at the exact same position as the text but with an x and y offset of 7 pixels so it really look like a shadow.
The shadow is black and has an opacity of 0.65 (65%).
Finally, we do a last overlay with the last image that we named in the previous operation -> prefinal.
The logo starts at 40 pixels from the left and 40 pixels from the top.
For example, this outputs:
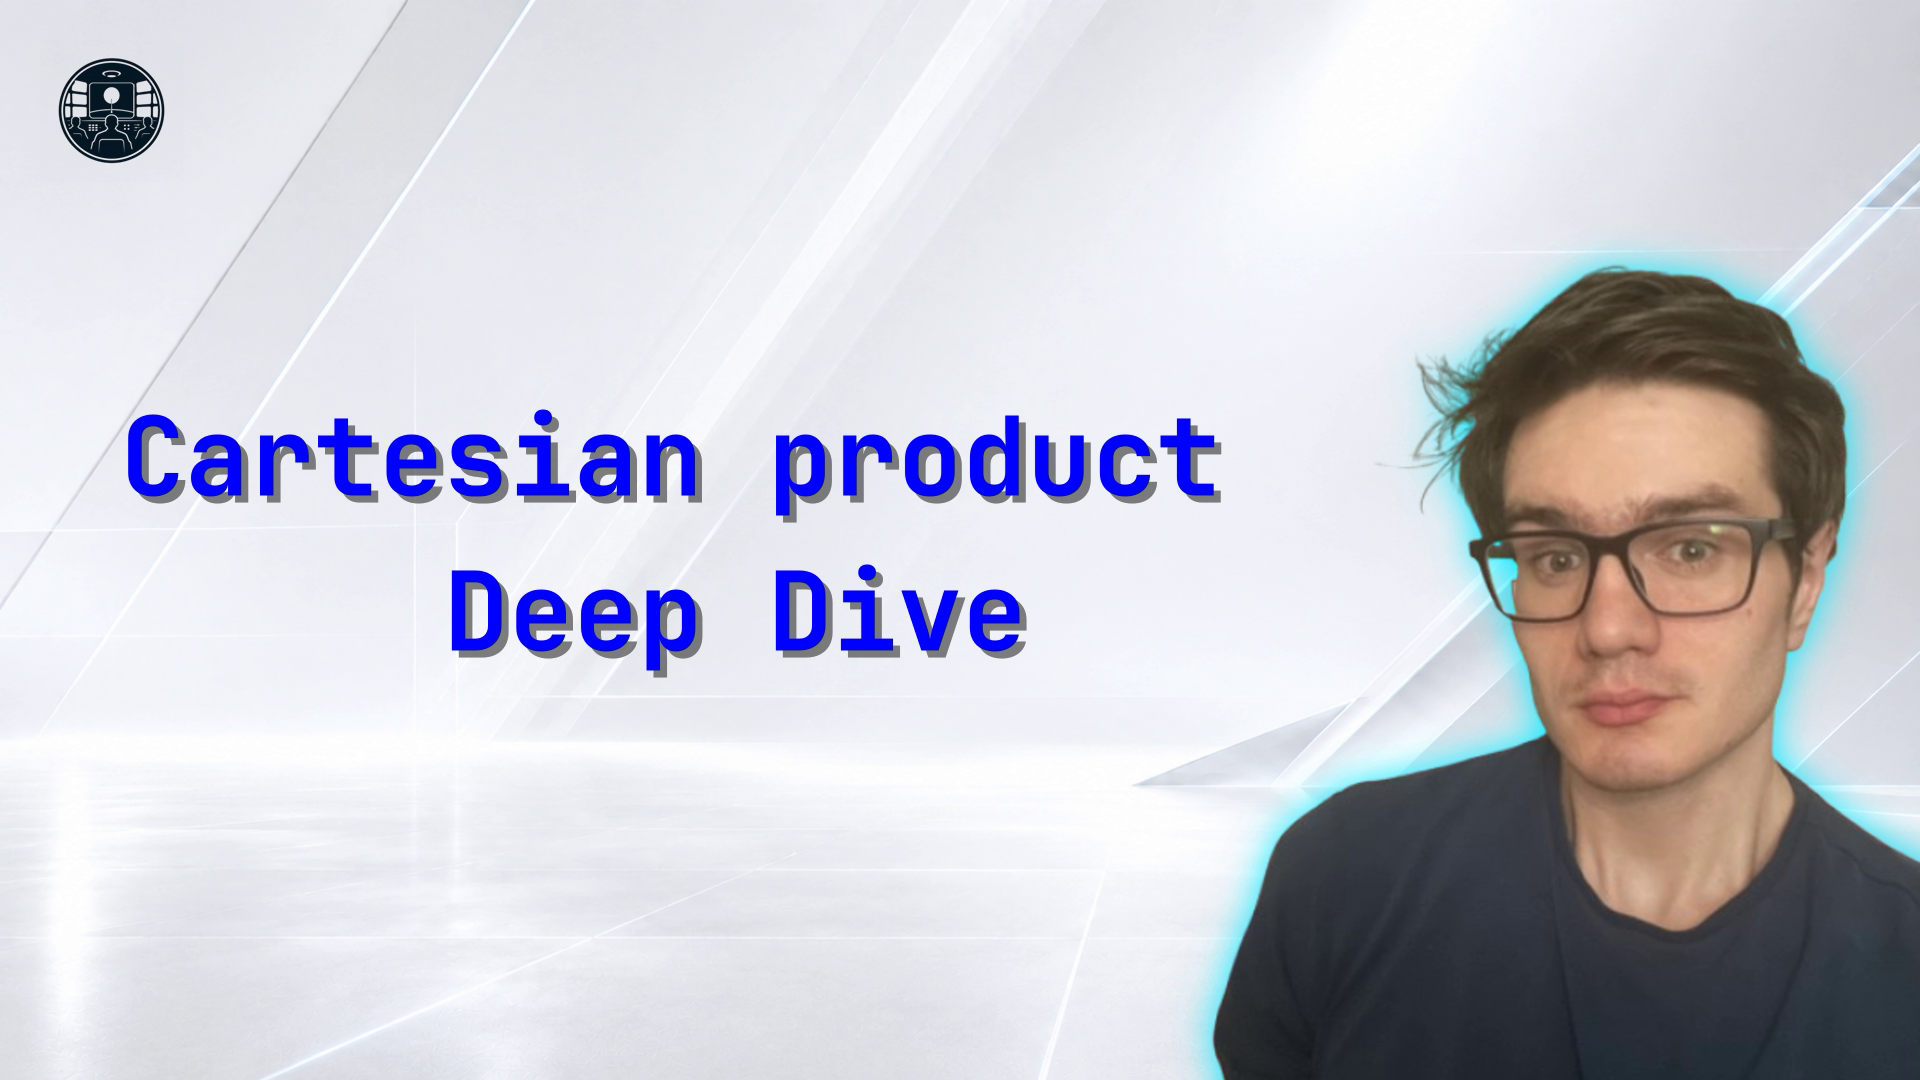
With this title:
Cartesian product
Deep Dive
OR
Cartesian product\n Deep Dive
All we need is imagemagick
But we can also translate this exact operation with imagemagick to stay in its ecosystem.
#!/usr/bin/env bash
set -e # exits the script immediately when a command fails
FONT="/usr/share/fonts/truetype/jetbrains-mono/JetBrainsMono-Bold.ttf"
TEXT="$(< title.txt)"
convert background/background.png -resize 1920x1080\! /tmp/bg.png
convert me/me4.png -resize x1080 /tmp/me.png
convert logo_blue.png -resize x144 /tmp/logo.png
convert \
-background none \
-font "$FONT" \
-pointsize 108 \
-fill blue \
-interline-spacing 12 \
label:"$TEXT" \
text.png
convert -size 1920x1080 xc:none \
\( text.png -fill black -colorize 100 \) \
-gravity west -geometry +122+4 -composite \
text.png \
-gravity west -geometry +120+0 -composite \
/tmp/text_layer.png
convert /tmp/bg.png \
/tmp/me.png -gravity southeast -geometry -80-140 -composite \
/tmp/text_layer.png -composite \
/tmp/logo.png -gravity northwest -geometry +40+40 -composite \
thumbnail2.png
Here, we got the EXACT same resize procedure:
convert background/background.png -resize 1920x1080\! /tmp/bg.png
convert me/me4.png -resize x1080 /tmp/me.png
convert logo_blue.png -resize x144 /tmp/logo.png
\! forces resizing to the exact dimensions. The backslash escapes ! so the shell does not interpret it before ImageMagick sees it.
Here, we got the text PNG creation:
convert -size 1920x1080 xc:none \
\( text.png -fill black -colorize 100 \) \
-gravity west -geometry +122+4 -composite \
text.png \
-gravity west -geometry +120+0 -composite \
/tmp/text_layer.png
It outputs that image:
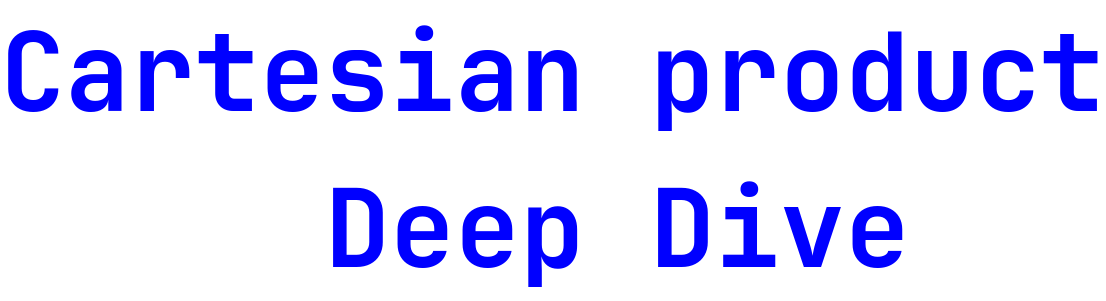
This creates a transparent image of dimensions 1920x1080:
convert -size 1920x1080 xc:none \
After that we fill the pixels that are not transparent with black. That is the text shadow (font-size 100).
\( text.png -fill black -colorize 100 \) \
After, we get outside from the sub-pipeline and we tell where to place the text.
\( text.png -fill black -colorize 100 \) \
-gravity west -geometry +122+4
We take the center point of the left / west edge of the image as a reference for the coordinate system, and define x=122 and y=4.
Note, just a small summary about the gravity coordinates:
northwest---------north---------northeast
| |
| |
| |
| |
| |
west center east
| |
| |
| |
| |
| |
southwest---------south---------southeast
Then we overlay the last image on the image stack (text shadow image) onto the first one (transparent background) with -composite.
Then, we load text.png (initial text image) and we we do the same.
During the final overlay, we just shift its position by 4 pixels in y from the shadow reference.
If text.png image had higher dimensions and/or was placed near an edge, its content may be cropped in the final result (and no offset position storage).
And in the final command, that is just the overlays.
convert /tmp/bg.png \
/tmp/me.png -gravity southeast -geometry -80-140 -composite \
/tmp/text_layer.png -composite \
/tmp/logo.png -gravity northwest -geometry +40+40 -composite \
thumbnail2.png
Corresponding to this composition:
logo.png
text_layer.png
me.png
bg.png
Speed comparisons
On my machine convert variant took:
❯ time bash script_convert.bash
real 0m2,024s
user 0m2,853s
sys 0m0,158s
While FFmpeg version took:
❯ time bash script_ffmpeg.bash
...
...
...
real 0m0,384s
user 0m0,332s
sys 0m0,075s
Conclusion
A good thumbnail balances channel identity and video novelty.
The composition is easy to reproduce and standardize from the command line, either with ImageMagick alone or with a mix of ImageMagick and FFmpeg.