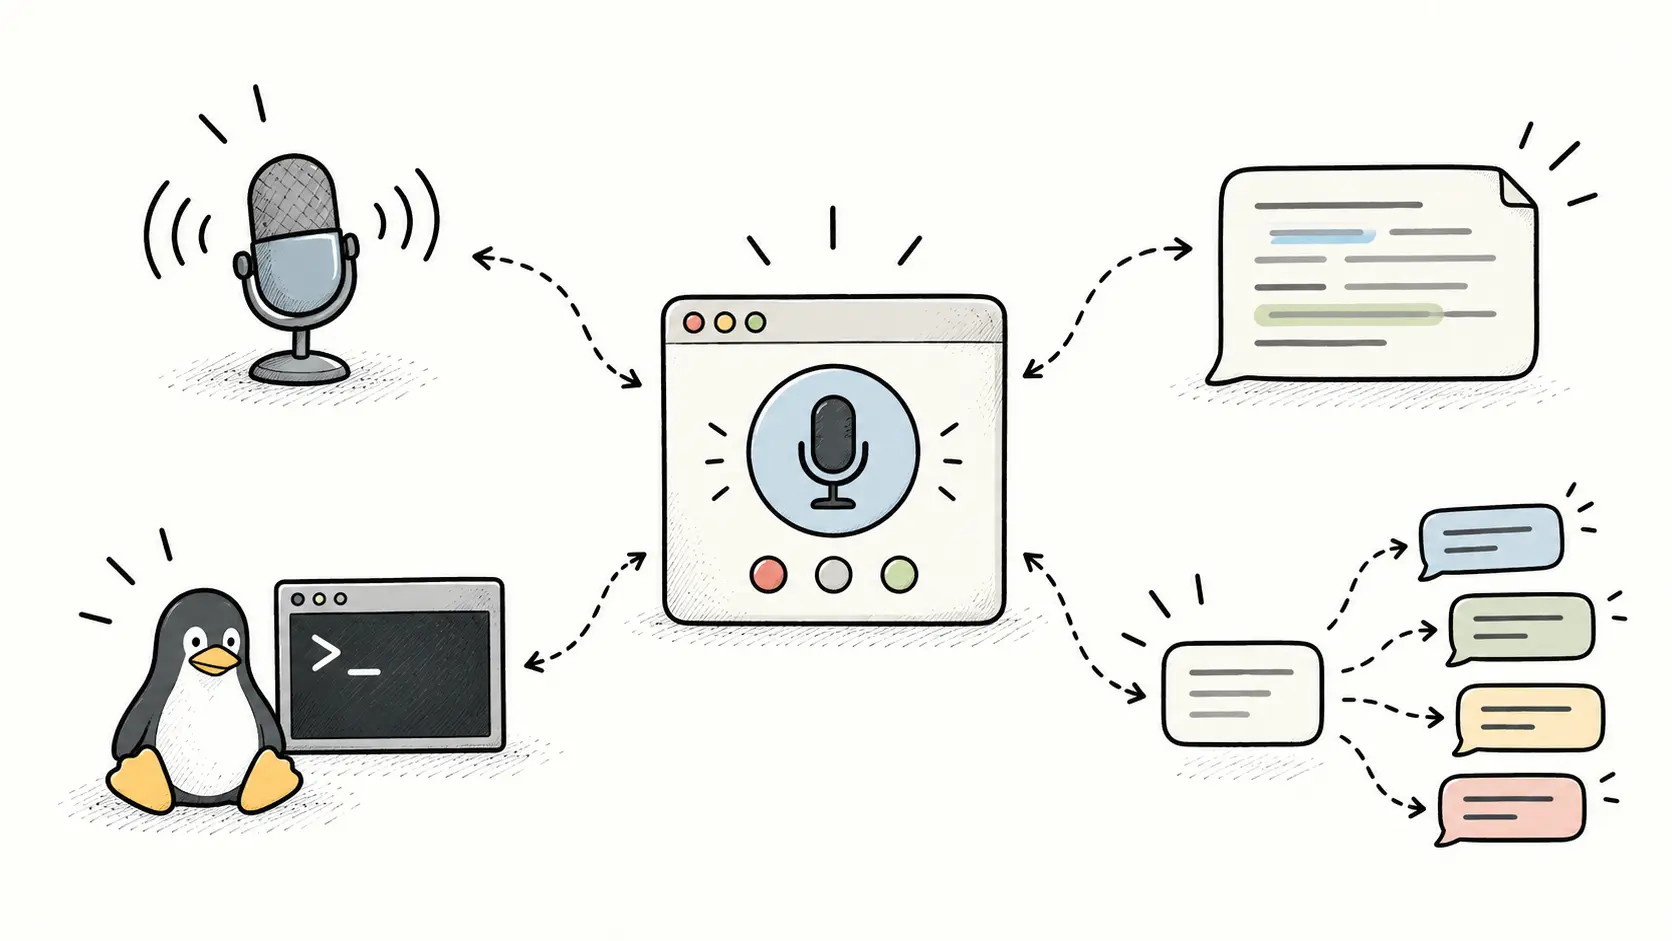
This article comes from a frustration I had with Discord Web.
I didn't have the possibility to directly send a voice message.
The only way to send one was to literally record my voice, save the file, and then send it manually.
But that was enough to give me an idea: if I had a way to simply speak and immediately send the damn message, that would already be great.
And then, imagine having a way to transcribe my voice directly into text and copy it straight to the clipboard; perfect for emails.
Even better: a way to reformulate what I've said in different tones!
That's the system I scripted yesterday, using keyboard shortcuts in my i3 environment, along with Bash, yad, notify, xclip, jq, ffmpeg, whisper.cpp, llama.cpp, systemd, and an open-source LLM model that I downloaded locally.
First, the features
I want to be able to press a keyboard shortcut that opens a small window with multiple buttons while immediately starting to record my voice.
The available actions are:
-
Stop recording and quit.
-
Stop recording and copy the audio file to the clipboard.
-
Stop recording, transcribe the audio to text, and copy the transcription to the clipboard.
-
Stop recording, transcribe the audio to text, reformulate it in a chosen tone, and copy the resulting text to the clipboard.
The setup
Downloads
On APT we download all the required packages we'll use with:
sudo apt update && sudo apt install -y \
git \
build-essential \
cmake \
ffmpeg \
yad \
xclip \
curl \
jq \
libnotify-bin
whisper.cpp
First, we'll download it:
> git clone https://github.com/ggerganov/whisper.cpp.git
We enter the project:
> cd whisper.cpp
Now, we'll generate all the configurations build files directly in whisper/build:
whisper > cmake -S . -B build
-
-S .means the source directory is the one we are here (whisper) -
-B buildtellscmaketo put the generated build files inbuild
But, what do we need this phase ?
One answer is because some code can take advantage of certain architecture-dependant feature such as:
AVX / AVX2
FMA
NEON
OpenMP
CUDA
Metal
BLAS
So it has to detect if it can use some compile flags.
Also, certain optional parts of the code can depend on libraries, so it check if they are installed, and where they are located.
Then, we finally compile it using the generated configuratiosn files:
whisper > cmake --build build -j
The -j flag means to build in parallel, using as much parallelism as the underlying build tool decides is available potentially using all CPU cores.
We could limit the dedicated cores for the build with:
whisper > cmake --build build -j 6
for example.
Now, the binaries are located in:
build/bin
We have:
bench libggml.so libwhisper.so.1 test-parakeet-full-diffusion test-whisper-zero-samples
libggml-base.so libggml.so.0 libwhisper.so.1.9.5 test-parakeet-full-gb1 whisper-bench
libggml-base.so.0 libggml.so.0.26.0 main test-parakeet-full-jfk whisper-cli
libggml-base.so.0.26.0 libparakeet.so parakeet-cli test-vad whisper-quantize
libggml-cpu.so libparakeet.so.1 parakeet-quantize test-vad-full whisper-server
libggml-cpu.so.0 libparakeet.so.1.9.5 test-common-utf8 test-whisper-buffer-loader whisper-vad-speech-segments
libggml-cpu.so.0.26.0 libwhisper.so test-parakeet test-whisper-lang-detect-abort
First we just create a directory for the whisper model:
mkdir -p .local/share/whisper
Now, we want to download the model that will actually transcribe my voice to text:
whisper > ./models/download-ggml-model.sh .local/share/whisper/large-v3-turbo
Then, we create a systemd service (in systemd user space) to activate the whisper.cpp server to be able to receive the input file and to return the text:
mkdir -p .config/systemd/user
and we create this file whisper-server.service.
We write the following in it:
[Unit]
Description=Local whisper.cpp transcription server
[Service]
Type=simple
ExecStart=%h/whisper.cpp/build/bin/whisper-server \
-m %h/.local/share/whisper/ggml-large-v3-turbo.bin \
-t 12 \
--host 127.0.0.1 \
--port 8081
Restart=on-failure
RestartSec=3
[Install]
WantedBy=default.target
The %h part is a systemd specifier that expands to the home directory of the user running the service.
/home/juju
So:
ExecStart=%h/whisper.cpp/build/bin/whisper-server
is resolved by systemd as:
/home/juju/whisper.cpp/build/bin/whisper-server
Now, we reload the unit files known to the user instance of systemd, because we have just created a new service file and want systemd to take it into account:
systemctl --user daemon-reload
The --user flag tells systemctl to communicate with the systemd instance associated with the current user, rather than the system-wide instance.
This user instance searches for unit files in several user-specific locations, including:
~/.config/systemd/user/
It can also use system-wide directories containing user units, such as /etc/systemd/user/ and /usr/lib/systemd/user/.
llama.cpp
This is very similar to whisper.cpp setup.
We first download it:
> git clone https://github.com/ggerganov/llama.cpp.git
Enter into the project:
cd llama.cpp
Then configure the build:
llama.cpp > cmake -B build
Then compile:
llama.cpp > cmake --build build -j
Now, we'll download the LLM that will rewrite my transcribed text to something either more:
-
formal
-
warm
-
Concise
-
Rigorous
I chose Qwen3-8B with the Q4_K_M quantization. The 8B model is large enough to handle multilingual rewriting and instruction-following reliably, while the 4-bit quantization reduces the model to roughly 5 GB, making it practical to run locally on my hardware (my GTX 1660 Super has 6 GB of VRAM) .
The download link is:
I downloaded it under ~/Téléchargements (~/Downloads).
Then, we'll create the service as .config/systemd/user/llama-server.service:
[Unit]
Description=Local llama.cpp server
After=network.target
[Service]
Type=simple
ExecStart=%h/llama.cpp/build/bin/llama-server -m %h/Téléchargements/Qwen3-8B-Q4_K_M.gguf -c 2048 -t 12 -ngl 99
Restart=on-failure
RestartSec=3
[Install]
WantedBy=default.target
Here, the server will listen on the port 8080 by default, so it does not conflict with the whisper server that listens to 8081.
And then we activate it:
systemctl --user daemon-reload
systemctl --user enable --now llama-server.service
Like that we could the following to request the model:
RESULT="$(
curl -s http://127.0.0.1:8080/v1/chat/completions \
-H 'Content-Type: application/json' \
-d "$(
jq -n \
--arg text "$TEXT" \
--arg style "$STYLE" \
'{
messages: [
{
role: "system",
content: "You rewrite transcribed speech. Always preserve the original language of the input. Never translate the text into another language. Preserve the original meaning and information. Do not add new information. Return only the rewritten text."
},
{
role: "user",
content: ("Rewrite the following text in a " + $style + " style:\n\n" + $text + "\n\n/no_think")
}
]
}'
)" |
jq -r '.choices[0].message.content'
)"
As you can see, we build the JSON payload using jq.
Instead of manually constructing a Bash string such as "...", we let jq generate valid JSON for us.
Here, jq does not read any JSON document from stdin, which is why we use the -n (--null-input) flag. It tells jq that the input must be readen as an argument value.
The variables we want to inject into the JSON are passed as command-line arguments with --arg:
--arg text "$TEXT"
--arg style "$STYLE"
So jq directly creates the JSON payload internally.
Then, we know that llama-server returns a JSON response following the OpenAI-compatible chat completion format.
The generated responses are stored in an array named choices. Each element of this array represents one possible completion produced by the model.
A simplified response looks like this:
{
"choices": [
{
"message": {
"role": "assistant",
"content": "WHISPER-OUTPUT"
}
}
]
}
The reason the model returns an array is that the API format is designed to support returning multiple completions for the same request. Even when only one response is generated, it is still wrapped in the choices array.
Here, we know that we just asked for one output, because we did not precise the variable n and its value, so it defaults to 1.
But, we could have passed it in the payload:
curl -sS http://127.0.0.1:8080/v1/chat/completions \
-H 'Content-Type: application/json' \
-d '{
"n": 3,
"messages": [
{
"role": "user",
"content": "Rewrite this sentence in a warm tone."
}
]
}'
Btw, the equivalent HTML request looks like:
POST /v1/chat/completions HTTP/1.1
Host: 127.0.0.1:8080
Content-Type: application/json
{
"messages": [
{
"role": "system",
"content": "You rewrite transcribed speech..."
},
{
"role": "user",
"content": "Rewrite the following text..."
}
]
}
We'll use the same curl method for the payload of whisper.cpp:
TEXT="$(
curl -sS http://127.0.0.1:8081/inference \
-H "Content-Type: multipart/form-data" \
-F "file=@$FILE" \
-F "response_format=json" \
-F "language=auto" |
jq -r '.text'
)"
Here, we put @$FILE to send the actual content of $FILE which is the .wav file containing the voice message, if we would just write $FILE, then only the literal filename would be sent.
Btw, here this is a multipart/form-data request, so the written HTML equivalent is:
<form
action="http://127.0.0.1:8081/inference"
method="post"
enctype="multipart/form-data"
>
<input type="file" name="file">
<input
type="hidden"
name="response_format"
value="json"
>
<input
type="hidden"
name="language"
value="auto"
>
<button type="submit">Transcribe</button>
</form>
The bash script
We'll create the following file:
.local/bin/voice-recorder
And write the following code in it:
#!/usr/bin/env bash
DIR="$HOME/Recordings"
mkdir -p "$DIR"
FILE="$DIR/voice-$(date +%Y%m%d-%H%M%S).wav"
ffmpeg \
-f pulse \
-i default \
-ar 16000 \
-ac 1 \
-c:a pcm_s16le \
"$FILE" &
PID=$!
yad \
--title="Voice recorder" \
--text="🎙 Recording…" \
--button="Copy audio:0" \
--button="Transcribe:1" \
--button="Stop:3" \
--button="Formal:4" \
--button="Warm:5" \
--button="Concise:6" \
--button="Rigorous:7" \
--width=320 \
--height=120
CHOICE=$?
kill -INT "$PID"
wait "$PID" 2>/dev/null
if [ "$CHOICE" -eq 0 ]; then
printf 'file://%s\n' "$FILE" |
xclip -selection clipboard -t text/uri-list
notify-send \
"Voice recorder" \
"Audio copied to clipboard"
elif [ "$CHOICE" -eq 1 ]; then
TEXT="$(
curl -sS http://127.0.0.1:8081/inference \
-H "Content-Type: multipart/form-data" \
-F "file=@$FILE" \
-F "response_format=json" \
-F "language=auto" |
jq -r '.text'
)"
printf '%s' "$TEXT" |
xclip -selection clipboard
notify-send \
"Voice transcription" \
"Transcription copied to clipboard"
elif [ "$CHOICE" -eq 3 ]; then
exit 0
elif [ "$CHOICE" -ge 4 ] && [ "$CHOICE" -le 7 ]; then
TEXT="$(
curl -sS http://127.0.0.1:8081/inference \
-H "Content-Type: multipart/form-data" \
-F "file=@$FILE" \
-F "response_format=json" \
-F "language=auto" |
jq -r '.text'
)"
case "$CHOICE" in
4)
STYLE="formal and professional"
;;
5)
STYLE="warm, friendly and natural"
;;
6)
STYLE="concise and direct"
;;
7)
STYLE="rigorous, precise and well-structured"
;;
esac
RESULT="$(
curl -s http://127.0.0.1:8080/v1/chat/completions \
-H 'Content-Type: application/json' \
-d "$(
jq -n \
--arg text "$TEXT" \
--arg style "$STYLE" \
'{
messages: [
{
role: "system",
content: "You rewrite transcribed speech. Always preserve the original language of the input. Never translate the text into another language. Preserve the original meaning and information. Do not add new information. Return only the rewritten text."
},
{
role: "user",
content: ("Rewrite the following text in a " + $style + " style:\n\n" + $text + "\n\n/no_think")
}
]
}'
)" |
jq -r '.choices[0].message.content'
)"
printf '%s' "$RESULT" |
xclip -selection clipboard
notify-send \
"Voice transcription" \
"$STYLE version copied to clipboard"
fi
This is a very simple script, the only part that is worth mentioning is maybe this part:
ffmpeg \
-f pulse \
-i default \
-ar 16000 \
-ac 1 \
-c:a pcm_s16le \
"$FILE" &
PID=$!
yad \
--title="Voice recorder" \
--text="🎙 Recording…" \
--button="Copy audio:0" \
--button="Transcribe:1" \
--button="Stop:3" \
--button="Formal:4" \
--button="Warm:5" \
--button="Concise:6" \
--button="Rigorous:7" \
--width=320 \
--height=120
CHOICE=$?
kill -INT "$PID"
wait "$PID" 2>/dev/null
We launch ffmpeg to record the voice in the background with the &, then we get its PID, launch the yad window to block the script and give the user the choice when to stop the record and what to do with it.
Then, we get the choices (yad button number), send a termination signal (SIGINT) to the ffmpeg process.
But:
kill -INT "$PID"
Does not wait the process to be terminated, it just sends the SIGINT, so we have to wait for it to be terminated, that's why we do the following directly afterward:
wait "$PID"
In fact we also hide stderr messages with the 2>/dev/null.
We have 3 descriptors:
0 = stdin
1 = stdout
2 = stderr
In everyday bash scripts, we rarely see the 0 descriptor being used.
Indeed, something like:
some-command 0>/dev/null
or equivalently:
some-command </dev/null
It is used when we want to make sure a command cannot read keyboard input. Its stdin is redirected from /dev/null, so any attempt to read from standard input immediately encounters EOF instead of waiting for user input which terminates its reading.
Now, we just make it executable with:
chmod +x .local/bin/voice-recorder
The i3 setup
Now, we just have to add a keyboard shortcut entry to the i3 configuration, I've chosen Ctrl+Shift+v.
So inside .config/i3/config, I add:
bindsym $mod+Shift+v exec --no-startup-id ~/.local/bin/voice-recorder
--no-startup-id tells i3 to run the command, but not to use i3’s startup-notification tracking for it.
The “startup notification” is an X11 desktop protocol/mechanism used by launchers and window managers to track the fact that an application is in the process of starting.
Roughly:
i3 launches application
|
V
a startup ID is created
|
V
that ID is passed through the environment
|
V
the application/window announces itself with that startup ID
|
V
i3 knows:
“this window belongs to that launch request”
This helps desktop environments with things like associating a new window with the launcher action, showing a busy cursor, and knowing when application startup has completed.
We can check the configuration synthax:
i3 -C ~/.config/i3/config
Finally, we just have to reload i3 config without restarting i3:
i3-msg reload
Conclusion
Hope this article was usefull ;)