On Sun May 17 21:35:37 CEST 2026, I decided it was time to start a YouTube channel to promote my articles.
Here is the link: https://www.youtube.com/@control-room-11
I already had a (very) messy YouTube experience.
I was absolutely brainwashed by the LukeSmith Wave at the time.

With my Patched DWM ( larbs config for the initiated ;) ).
I had just plugged a cheap webcam into USB 2.0, without tweaking any firmware-level settings to make the image look decent.
In this article i will share the evolution of my setup across the ages as a practical guide so you can reproduce and understand each confs according to your needs.
This article is aimed at beginner Linux users who want to build a simple but controllable video-creator setup.
FFmpeg CLI - Practical use
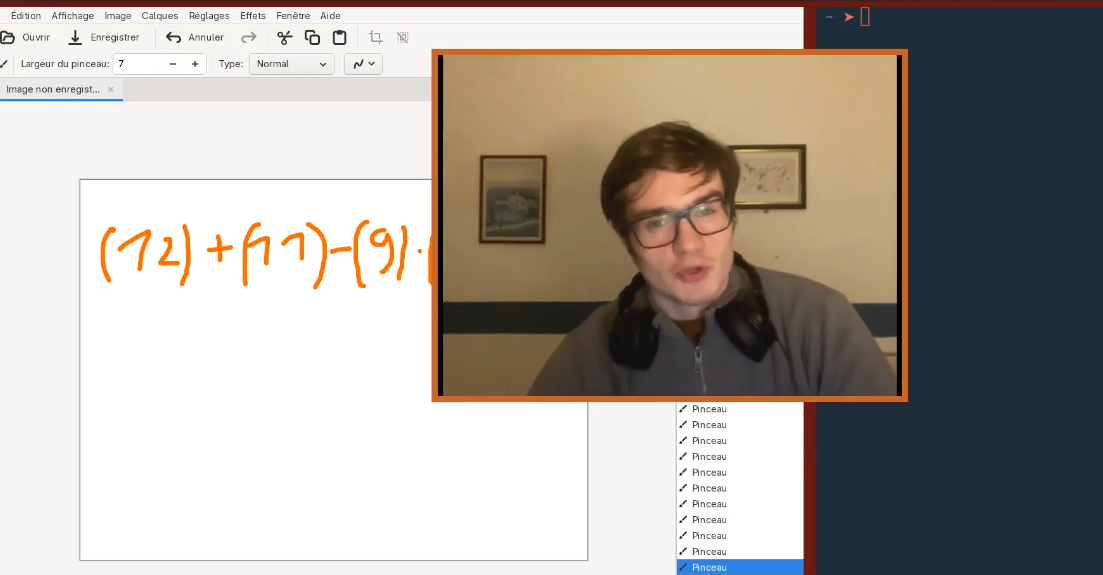
My first “scene system” was not OBS. It was DWM. My webcam was just another window, placed manually in the top-right corner.
To record my videos, at first i used FFmpeg.
sudo apt update
sudo apt install ffmpeg
Then, i just check the version i'll use for this tutorial.
❯ ffmpeg -version
ffmpeg version 6.1.1-3ubuntu5 Copyright (c) 2000-2023 the FFmpeg developers
built with gcc 13 (Ubuntu 13.2.0-23ubuntu3)
configuration: --prefix=/usr --extra-version=3ubuntu5 --toolchain=hardened --libdir=/usr/lib/x86_64-linux-gnu --incdir=/usr/include/x86_64-linux-gnu --arch=amd64 --enable-gpl --disable-stripping --disable-omx --enable-gnutls --enable-libaom --enable-libass --enable-libbs2b --enable-libcaca --enable-libcdio --enable-libcodec2 --enable-libdav1d --enable-libflite --enable-libfontconfig --enable-libfreetype --enable-libfribidi --enable-libglslang --enable-libgme --enable-libgsm --enable-libharfbuzz --enable-libmp3lame --enable-libmysofa --enable-libopenjpeg --enable-libopenmpt --enable-libopus --enable-librubberband --enable-libshine --enable-libsnappy --enable-libsoxr --enable-libspeex --enable-libtheora --enable-libtwolame --enable-libvidstab --enable-libvorbis --enable-libvpx --enable-libwebp --enable-libx265 --enable-libxml2 --enable-libxvid --enable-libzimg --enable-openal --enable-opencl --enable-opengl --disable-sndio --enable-libvpl --disable-libmfx --enable-libdc1394 --enable-libdrm --enable-libiec61883 --enable-chromaprint --enable-frei0r --enable-ladspa --enable-libbluray --enable-libjack --enable-libpulse --enable-librabbitmq --enable-librist --enable-libsrt --enable-libssh --enable-libsvtav1 --enable-libx264 --enable-libzmq --enable-libzvbi --enable-lv2 --enable-sdl2 --enable-libplacebo --enable-librav1e --enable-pocketsphinx --enable-librsvg --enable-libjxl --enable-shared
libavutil 58. 29.100 / 58. 29.100
libavcodec 60. 31.102 / 60. 31.102
libavformat 60. 16.100 / 60. 16.100
libavdevice 60. 3.100 / 60. 3.100
libavfilter 9. 12.100 / 9. 12.100
libswscale 7. 5.100 / 7. 5.100
libswresample 4. 12.100 / 4. 12.100
libpostproc 57. 3.100 / 57. 3.100
And its inspection tool -> ffprobe.
❯ ffprobe -version
ffprobe version 6.1.1-3ubuntu5 Copyright (c) 2007-2023 the FFmpeg developers
built with gcc 13 (Ubuntu 13.2.0-23ubuntu3)
configuration: --prefix=/usr --extra-version=3ubuntu5 --toolchain=hardened --libdir=/usr/lib/x86_64-linux-gnu --incdir=/usr/include/x86_64-linux-gnu --arch=amd64 --enable-gpl --disable-stripping --disable-omx --enable-gnutls --enable-libaom --enable-libass --enable-libbs2b --enable-libcaca --enable-libcdio --enable-libcodec2 --enable-libdav1d --enable-libflite --enable-libfontconfig --enable-libfreetype --enable-libfribidi --enable-libglslang --enable-libgme --enable-libgsm --enable-libharfbuzz --enable-libmp3lame --enable-libmysofa --enable-libopenjpeg --enable-libopenmpt --enable-libopus --enable-librubberband --enable-libshine --enable-libsnappy --enable-libsoxr --enable-libspeex --enable-libtheora --enable-libtwolame --enable-libvidstab --enable-libvorbis --enable-libvpx --enable-libwebp --enable-libx265 --enable-libxml2 --enable-libxvid --enable-libzimg --enable-openal --enable-opencl --enable-opengl --disable-sndio --enable-libvpl --disable-libmfx --enable-libdc1394 --enable-libdrm --enable-libiec61883 --enable-chromaprint --enable-frei0r --enable-ladspa --enable-libbluray --enable-libjack --enable-libpulse --enable-librabbitmq --enable-librist --enable-libsrt --enable-libssh --enable-libsvtav1 --enable-libx264 --enable-libzmq --enable-libzvbi --enable-lv2 --enable-sdl2 --enable-libplacebo --enable-librav1e --enable-pocketsphinx --enable-librsvg --enable-libjxl --enable-shared
libavutil 58. 29.100 / 58. 29.100
libavcodec 60. 31.102 / 60. 31.102
libavformat 60. 16.100 / 60. 16.100
libavdevice 60. 3.100 / 60. 3.100
libavfilter 9. 12.100 / 9. 12.100
libswscale 7. 5.100 / 7. 5.100
libswresample 4. 12.100 / 4. 12.100
libpostproc 57. 3.100 / 57. 3.100
The command i use:
ffmpeg \
-f x11grab -framerate 30 -video_size 1920x1080 -i "$DISPLAY" \
-f pulse -i alsa_input.usb-JMDZ_MICROPHONE_WOODBRASS_UM1_20211207-00.mono-fallback \
-c:v libx264 -preset veryfast -crf 23 \
-ar 48000 -ac 1 -c:a aac -b:a 160k \
my_video.mkv
Let's describe what is going on here.
Video Input
-f x11grab -framerate 30 -video_size 1920x1080 -i "$DISPLAY"
First, what's x11grab, looks like an external program with its own args.
Indeed.
x11grab is an FFmpeg input device, not a standalone program you usually run yourself.
It is a module inside FFmpeg/libavdevice that knows how to ask the X11 display server for pixels from your screen.
So,
ffmpeg -f x11grab -video_size 1920x1080 -i "$DISPLAY" my_video.mkv
It means:
- FFmpeg, use the x11grab input backend.
- Connect to my X11 display.
- Grab a 1920x1080 rectangle of pixels. (start at the upper left)
- Encode those frames into a video file.
You get it right, it grabs the whole screen, there is no concept of special windows.
But in this case this is exactly what i wanted.
DWM was my tiling window manager but also my OBS scenes dashboard in this case.
For example my webcam was literally a visible window i set at the top-right.
$DISPLAY is usually something like:
:0
Example:
❯ echo $DISPLAY
:0
That means “connect to X server display number 0”.
We can also capture a specific screen region:
ffmpeg \
-f x11grab \
-framerate 30 \
-video_size 800x600 \
-i "$DISPLAY+100,200" \
out.mkv
This means:
- capture an
800x600rectangle - starting
100pixels from the left - and
200pixels from the top
Raw Video bitrate
The bitrate is the amount of bits per second that x11grab will send.
So we have explicitely precised -framerate 30.
Ok now how much does an image weighs ?
We also make clear to use this dimension -video_size 1920x1080.
Ok but that just tells us the amount of pixels for each frame, which makes 1920 * 1080 = 2073600 pixels.
So how much does a pixel weighs ?
For that i launched:
❯ ffmpeg -loglevel verbose -f x11grab -framerate 30 -video_size 1920x1080 -i "$DISPLAY" -f null -
To get more informations about format in the output.
And i saw this line:
w:1920 h:1080 pixfmt:bgr0 tb:1/1000000 fr:30/1 sar:0/1
What is interesting us is the pixel format and it appears that it uses the bgr0 pixel format.
It must encode color channel, so how does it do ?
It stores one pixel using 4 contiguous bytes.
The first byte stores Blue, the second byte stores Green, and the third byte stores Red. Each color channel uses 8 bits, so the actual color information is:
8 + 8 + 8 = 24 bits.
And yes in this order that is why it is called bgr and not rgb.
The fourth byte is unused padding, usually written as 0. Therefore, each pixel occupies 32 bits in memory, even though only 24 bits encode visible color.
Why 25% of left spaces ?
For instance the bgr24 format exists and do exactly what you think it encodes as:
B1 G1 R1 B2
G2 R2 B3 G3
R3 B4 G4 R4
...
bgr0 uses 4 bytes per pixel, which is wasteful in storage but convenient in memory: each pixel starts at a 4-byte boundary, making addressing and many CPU operations simpler than tightly packed 3-byte pixels like bgr24.
So now we got 32 bits per pixel, 2073600 pixels per frame and 30 frames per second.
Then the raw framerate is 32 * 2073600 * 30 = 1990656000 bits -> 1.99GBits per second.
That is why we need a video compression algorithm like H.264 like we'll see.
Video Encoding
Now, for the video encoding:
-c:v libx264 -preset veryfast -crf 23 \
It means “use the libx264 encoder for video”.
-> So the raw frames coming from x11grab:
Raw screen frames: 1920x1080, 30 fps
are encoded on the fly into H.264 video.
Then:
-preset veryfast
Controls how much CPU x264 spends trying to compress efficiently.
Hence, it does NOT mean better visual quality.
It is "how hard" the encoder works to achieve the same quality/bitrate.
H.264 is a video codec: a way to represent video frames as compressed bits so the video is much smaller than raw pixels, while still looking close to the original.
So the mental model is:
Roughly:
- ultrafast = less CPU, bigger file
- veryfast = fast, decent size
- medium = slower, smaller/better compression
- slow = more CPU, smaller file
And:
-crf 23
Sets the quality target. Lower means better quality and larger files:
- 18 = very good quality, bigger
- 20 = good
- 23 = default-ish, smaller
- 28 = noticeably worse, much smaller
So if i set it to 18 with -preset veryfast and the video is long, i will have a heavy video file.
Especially if there are a lot of movements, because H.264 represents pixels difference between frames -> movements -> temporal compression.
Because H.264 does not usually store every frame as a full independent image. It tries to exploit the fact that most video frames are similar to nearby frames.
Conceptually:
- Frame 1: full-ish reference frame
- Frame 2: "mostly like Frame 1, except this block moved here, and these pixels changed"
- Frame 3: "mostly like Frame 2, except..."
And of course it also compresses redundancy inside one frame.
You get it, “pixels difference between frames” part is temporal compression.
More precisely, H.264 often splits frames into blocks and does:
-
motion estimation = this block in the current frame looks like that block in a previous/future frame
-
motion vector = the block moved from there to here
And others...
So instead of storing all pixels of the new frame.
it can store something closer to:
- block moved by (+12, -3) plus small correction data
That is why movement matters.
There are different frame types:
- I-frame = self-contained image-ish frame
- P-frame = predicted from previous frames
- B-frame = predicted from previous and/or future frames
So a video stream is usually like:
I P B B P B B P ...
Of course, I-frames are heavier because does not rely on other frames to encode some of its pixels groups (blocks).
So let's see its performance, we will just record a video with the same settings as the example FFmpeg command:
ffmpeg -f x11grab -framerate 30 -video_size 1920x1080 -i "$DISPLAY" -c:v libx264 -preset veryfast -crf 23 vid.mkv
Now i just get the duration of the video.
❯ ffprobe -v error -show_entries format=duration vid.mkv
[FORMAT]
duration=9.833000
[/FORMAT]
Ok, 9.83 seconds.
And now how much it weighs ?
> stat -c%s vid.mkv
217683
So the compressed video bitrate is at 217 683 / 9.83 = 22144 bytes per second = 177158 bits per second instead of raw uncompressed which is at 1.99GBits -> That is a 11232.91 weigh decrease !
But in fact i just filmed a little video with pratically no movements, this is why this is so impressive.
And also with FFmpeg you can see the bitrate varies on the fly according to the movements of your video.
frame= 148 fps= 26 q=29.0 size= 144kB time=00:00:06.26 bitrate= 188.5kbit
frame= 164 fps=26 q=26.0 size=144kB time=00:00:06.80 bitrate= 173.8kbit
frame= 180 fps=27 q=29.0 size=144kB time=00:00:07.33 bitrate= 161.1kbit
...
Audio Input
Now, the audio.
-f pulse -i alsa_input.usb-JMDZ_MICROPHONE_WOODBRASS_UM1_20211207-00.mono-fallback \
Ok, first you immediatly get what does -i mean, of course that's the input.
But in fact, when i plugged my mic, i did not know its name on the Linux system.
For that i just used PulseAudio control tool -> pactl.
PulseAudio is the audio server on Linux, that is one abstraction layer above Alsa.
The stack is roughly:
Application
Firefox / OBS / FFmpeg / Discord / mpv
|
V
Audio server
PulseAudio or PipeWire (newer)
|
V
ALSA
Linux kernel sound driver layer
|
V
Hardware
sound card / USB mic / headphones
Using ALSA directly is often painful because hardware devices can be exclusive, awkwardly named, and hard to mix.
For example, this is ALSA-style:
ffmpeg -f alsa -i hw:1,0 out.mkv
That talks closer to the hardware.
PulseAudio handles the following functionalities that make it higher level and much more friendly to use.
multiple apps playing sound at once
per-app volume
choosing default microphone
choosing output device
recording system audio through monitor sources
Bluetooth audio routing
So apps do not need to know your exact sound card. They can just say:
play sound to default output
record from default microphone
But there is a new chalenger that came along -> PipeWire.
But here’s the clever part: PipeWire provides a PulseAudio compatibility server.
So many apps still think they are talking to PulseAudio, but actually they are talking to PipeWire.
That's why when i had to list my audio sources devices with pactl:
❯ pactl list short sources
56 alsa_input.usb-JMDZ_MICROPHONE_WOODBRASS_UM1_20211207-00.mono-fallback PipeWire s16le 1ch 48000Hz SUSPENDED
60 alsa_output.pci-0000_0a_00.4.iec958-stereo.monitor PipeWire s32le 2ch 48000Hz SUSPENDED
61 alsa_input.pci-0000_0a_00.4.analog-stereo PipeWire s32le 2ch 48000Hz SUSPENDED
773 alsa_output.usb-Generic_USB_Audio-00.analog-stereo.monitor PipeWire s24le 2ch 48000Hz RUNNING
4724 alsa_output.pci-0000_08_00.1.hdmi-stereo.monitor PipeWire s32le 2ch 48000Hz SUSPENDED
4901 alsa_input.usb-webcamvendor_NexiGo_N60_FHD_Webcam_Audio_Aug_6_2022-10_32_24-02.mono-fallback PipeWire s16le 1ch 16000Hz SUSPENDED
Telling that it is PipeWire that handle my WOODBRASS mic, it stills work with pulse in FFmpeg.
So this:
ffmpeg -f pulse -i default out.mkv
really means:
FFmpeg asks for PulseAudio input
|
V
PipeWire receives it via PulseAudio compatibility
|
V
PipeWire captures your selected microphone/source
|
V
FFmpeg receives audio samples
PipeWire is more than what PulseAudio is designed for
PipeWire exists because Linux needed one modern media system instead of a pile of separate ones.
Before:
PulseAudio → normal desktop audio
JACK → pro / low-latency audio
ALSA → low-level hardware audio
V4L2 → webcams/video devices
X11 grab → screen capture, insecure but easy
Wayland → secure, but breaks old “just grab the screen” model
PipeWire’s role is:
audio + video + screen capture + routing + permissions
So it can handle:
- microphones
- desktop audio
- webcams
- screen sharing
- OBS capture
- browser calls
- Flatpak/sandboxed app media access
What, FlatPak ???
Flatpak apps are sandboxed. That means an app installed as a Flatpak is not supposed to freely access your whole system.
Instead, they ask through a permission system called xdg-desktop-portal.
The flow is basically:
Flatpak app wants screen/mic/camera
|
V
asks xdg-desktop-portal
|
V
desktop shows permission dialog
|
V
you approve screen/window/mic/camera
|
V
PipeWire gives the app a controlled media stream
So PipeWire is the pipe that transports the media stream safely into the sandboxed app.
And yess, PipeWire covers a much wider surface:
- desktop audio
- pro audio / JACK-style low latency
- audio routing graph
- microphones
- speakers
- webcams
- screen capture
- window capture
- sandboxed app media access
- Wayland-compatible screen sharing
So our FFmpeg command is perfectly fine and better for our use case (directly communicating with x11grab, because that is what we want -> sharing the whole screen)
ffmpeg \
-f x11grab -framerate 30 -video_size 1920x1080 -i "$DISPLAY" \
-f pulse -i alsa_input.usb-JMDZ_MICROPHONE_WOODBRASS_UM1_20211207-00.mono-fallback \
-c:v libx264 -preset veryfast -crf 23 \
-ar 48000 -ac 1 -c:a aac \
my_video.mkv
And, here pulse is PulseAudio compatibility layer for Pipewire.
Because a truly PipeWire-native capture flow is more like:
screen/window selected through portal
|
V
PipeWire stream
|
V
OBS / browser / compatible recorder
-> Absolutely not what is intended for this simple use-case i had
Raw Audio bitrate
In the command we see -ar 48000.
It is the sample rate its equivalent for the video is the framerate, this is how many times we measure the sound values in a 1 second interval.
Here the measure is done 48k times in one second.
Why did i choose this value ?
Because remember the output of pactl list short sources.
57 alsa_input.usb-JMDZ_MICROPHONE_WOODBRASS_UM1_20211207-00.mono-fallbackPipeWire s16le 1ch 48000Hz SUSPENDED
We see that the mic measures at this exact rate -> 48000Hz.
Now, we need to determine how the value of the measure is encoded.
And in fact we already know it, each value is encoded into a s16le.
It is a signed 16 bit integer.
-
s-> signed -
le-> little-endian encoded -> means that the least significant bytes are at the right
For example this s16le:
0x1234
In little-endian memory, it is stored as:
address 0: 0x34 /* low byte */
address 1: 0x12 /* high byte */
So visually 0x3412.
In big-endian memory, it would be stored in the opposite order:
address 0: 0x12 /* high byte */
address 1: 0x34 /* low byte */
Inside each byte, the bit order is absolutely not reversed.
Going back to the raw bitrate computation.
We got one channel (my mic is mono 1 channel -> 1ch) and in ffmpeg we explicitely precised it with audio channel param -ac 1.
So we got 1 * 48000 * 16 = 768000 bits => 768 kbits per second
Nowhere near the raw video bitrate at 1.99GBits per second but still we can optimize the storage by using audio codec like aac which uses a lossy compression algorithm we'll discuss.
Audio encoding
Now, for the audio encoding.
-ar 48000 -ac 1 -c:a aac -b:a 160k
We use the aac codec here -c:a aac and we tell that we want to compress the bitrate to 160 kbits per second.
What does acc?
First the data stream is received in PCM format, it means raw amplitude.
So at a regular time interval it will analyze the frequencies that appear in the block of samples.
What i mean by that is that it will basically perform a Fourier Transform, to compute the frequencies that appeared at a certain time (the current block of samples).
Then because human hearing is frequency based, it will compress certain frequencies that we are not very sensitive to.
And the compression level is in fact very accurate because here we explicitely tell that we want a bitrate of 160 kbits per second, so in this case just 160 000 / 768 000 = 4.8 times smaller -> stil good optimizations.
Here we have a much more direct bitrate target than with video encoding: -b:a 160k tells the AAC encoder to aim around 160 kbit/s.
OBS
You get it right, animations and overlays controled in real time are basically impossible in FFmpeg, it is just not the right tool for that.
And i do not want my Desktop Environment being a mess with a tons of floating window everywhere to mimic an external contrled overlay flow lol.
So i switched to OBS.
(I'm on Linux Mint)
> sudo add-apt-repository ppa:obsproject/obs-studio
> sudo apt update
> sudo apt install obs-studio
Then launched it:
> obs
And here i had fun making a good setup.
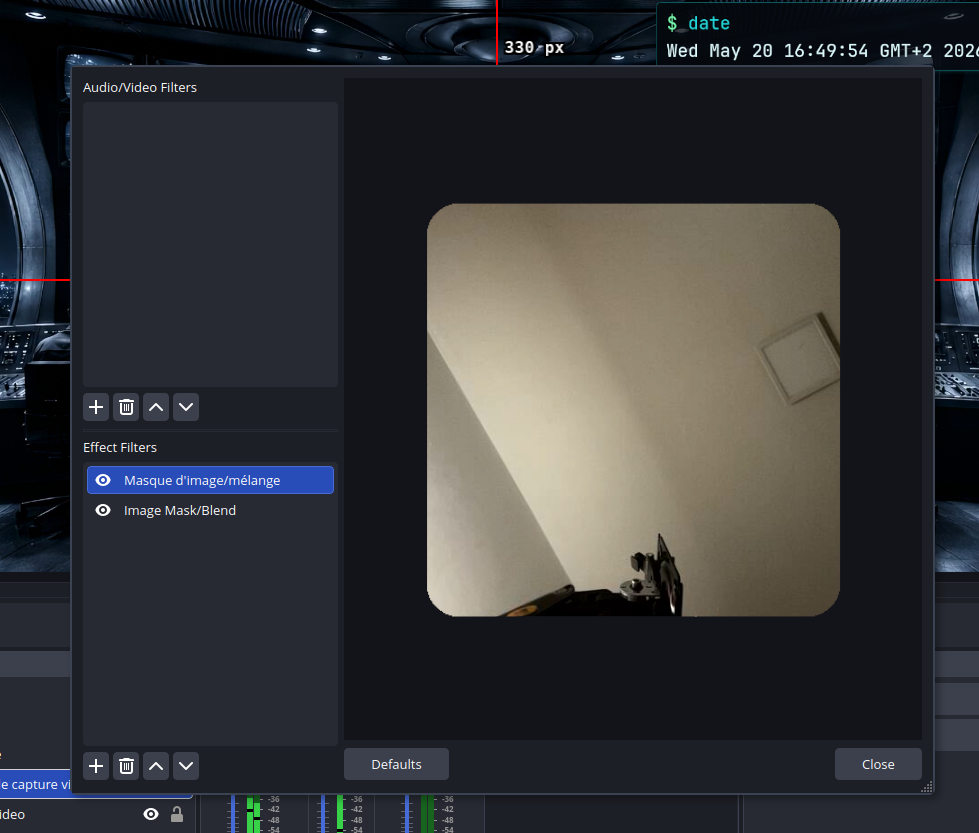
So basically to crop my webcam I used this PNG created via convert.
❯ convert -size 400x400 xc:none -fill red -stroke none -draw "roundrectangle 10,10 390,390 30,30" rounded_rectA.png
Then go to filters of the webcam source V4L2 (right click on it) -> image blend.
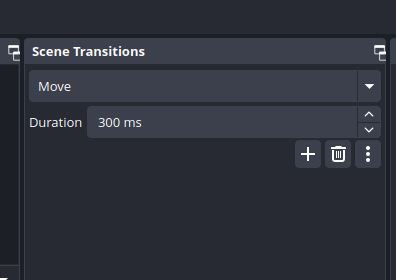
I created 2 scenes, one webcam-focues and another screen-focused (XSHM video source).
The animation i use to switch over the 2 scenes is in fact a plugin.
You can find it here.
https://obsproject.com/forum/resources/move.913/?utm_source=chatgpt.com
I downloaded the Linux version as a zip.
Then:
> unzip obs-move-transition-3.2.1.zip -d move-transition
> ls move-ttransition2
move-transition-3.2.1-x86_64-linux-gnu.deb
Ho a .deb, nice now i just install it via apt.
> sudo apt install ./move-transition-3.2.1-x86_64-linux-gnu.deb
The I (re)start obs.
And in the Scene-Transition part, i see the move transition.
OBS HTML and CSS Animations
But where does the animations come from on the webcam-scene ?
They come from .html file, yess !
Indeed, OBS uses Chromium for browser sources.
So first the tect under my webcam (my blog address).
<!DOCTYPE html>
<html>
<head>
<meta charset="UTF-8" />
<style>
:root {
--cyan: #23D8DB;
--blue: #2394DB;
--border: rgba(35, 216, 219, 0.45);
--chars: 29;
}
body {
margin: 0;
background: transparent;
font-family: "JetBrains Mono", monospace;
overflow: hidden;
}
.wrapper {
display: inline-flex;
align-items: center;
gap: 10px;
width: fit-content;
padding: 14px 16px;
border-radius: 14px;
background:
linear-gradient(135deg, rgba(5, 10, 18, 0.92), rgba(7, 16, 28, 0.78)),
radial-gradient(circle at top left, rgba(35, 216, 219, 0.20), transparent 42%),
radial-gradient(circle at bottom right, rgba(35, 148, 219, 0.22), transparent 48%);
border: 1px solid var(--border);
box-shadow:
0 0 20px rgba(35, 216, 219, 0.14),
inset 0 0 16px rgba(35, 216, 219, 0.05);
position: relative;
overflow: hidden;
}
.prompt {
color: var(--blue);
font-size: 42px;
text-shadow:
0 0 10px rgba(35, 148, 219, 0.9),
0 0 22px rgba(35, 148, 219, 0.42);
}
.typewriter {
position: relative;
display: inline-block;
overflow: hidden;
white-space: nowrap;
width: 0;
max-width: calc(var(--chars) * 1ch);
/* 1ch is the width of character "0" with the current font */
opacity: 1;
color: var(--cyan);
font-size: 64px;
text-shadow:
0 0 12px rgba(35, 216, 219, 0.72),
0 0 32px rgba(35, 216, 219, 0.22);
padding-right: 0.15ch;
animation:
typing 2s steps(var(--chars), jump-end) forwards;
}
.typewriter::after {
content: "";
position: absolute;
right: 0;
top: 0.12em;
width: 1ch;
height: 0.95em;
opacity: 0;
background: var(--cyan);
box-shadow:
0 0 10px rgba(35, 216, 219, 0.85),
0 0 22px rgba(35, 216, 219, 0.32);
animation:
block-blink 2s steps(1, end) forwards;
}
@keyframes typing {
from { width: 0; }
to { width: calc(var(--chars) * 1ch); }
}
@keyframes block-blink {
0%, 15% {
opacity: 0;
}
17%, 33% {
opacity: 1;
}
34%, 50% {
opacity: 0;
}
51%, 66% {
opacity: 1;
}
67%, 83% {
opacity: 0;
}
84%, 100% {
opacity: 1;
}
100% {
opacity: 0;
}
/*
because forwards freezes to the last state of the animation
*/
}
</style>
</head>
<body>
<div class="wrapper">
<span class="prompt">$</span>
<div class="typewriter">https://julienlargetpiet.tech</div>
</div>
</body>
</html>
The key element is:
.wrapper {
display: inline-flex;
align-items: center;
gap: 10px;
width: fit-content; /* makes the element’s box shrink/grow to fit its content width */
padding: 14px 16px; /* y and x space between content and this container */
border-radius: 14px;
background:
linear-gradient(135deg, rgba(5, 10, 18, 0.92), rgba(7, 16, 28, 0.78)),
radial-gradient(circle at top left, rgba(35, 216, 219, 0.20), transparent 42%),
radial-gradient(circle at bottom right, rgba(35, 148, 219, 0.22), transparent 48%);
border: 1px solid var(--border);
box-shadow:
0 0 20px rgba(35, 216, 219, 0.14),
inset 0 0 16px rgba(35, 216, 219, 0.05);
position: relative;
overflow: hidden; /* elements or part of elements inside this container that exceed contaner space go cut off */
}
As you see .wrapper position is relative so everything it contains that has position: absolute; will have the start of their coordinate system the same start as the .wrapper instance it is contained in.
Example, the normal document flow with default position value -> static:
<div style="position: relative;">
<div style="position: static;">A</div>
<div>B</div>
</div>
Will output:

But, look what hapen when the child position is absolute.
<div style="position: relative;">
<div style="position: absolute;">A</div>
<div>B</div>
</div>

Yess, "A" and "B" are merged.
Because in the document flow, the browser makes a clear distinction between elements that have absolute position and those who don't in term of the space they occupy in the document flow.
In normal document flow, all elements takes space and come one after the other.
But position: absolute; elements does not reserves space, hence the second child "B" takes the first available position which is visually the same position as "A".
Now, some properties that differes between two elements whose their position is absolute but one having no explicit coordinate contrary to the other.
First one:
<div style="position: relative;">
<div>B</div>
<div style="position: absolute; top: 0;">A</div>
</div>
Same output.
Because i explicitely said that i wanted "A" be at the top of the parent container.
But now:
<div style="position: relative;">
<div>B</div>
<div style="position: absolute;">A</div>
</div>

Yess, not merged !
Why ?
Because when an element with position: absolute; has not explicit coordinate set, it is treated as an element with default positioning, that's why it come afterwards.
But still does not reserve space.
That is why this:
<div style="position: relative;">
<div>B</div>
<div style="position: absolute;">A</div>
</div>
<div style="position: relative;">
<div>B</div>
<div style="position: absolute;">A</div>
</div>
Will output that:

The background
background:
linear-gradient(135deg, rgba(5, 10, 18, 0.92), rgba(7, 16, 28, 0.78)),
radial-gradient(circle at top left, rgba(35, 216, 219, 0.20), transparent 42%),
radial-gradient(circle at bottom right, rgba(35, 148, 219, 0.22), transparent 48%);
So first there will be a gradient starting at top-left down to bottom-right starting from this color rgba(5, 10, 18, 0.92) to this one rgba(7, 16, 28, 0.78).
Because, the coordinate system for this gradient is a little weird.
That is basicaly an arrow whose first point is anchored at the center of a circle, and we rotate it by 135 deg.
So it points to bottom-left like:
X
\
\
_\/
Now, for the radial-gradient like:
radial-gradient(circle at top left, rgba(35, 216, 219, 0.20), transparent 42%),
The circle center is positioned at top left element coordinate, so basically at its start (top-left).
And in fact the color must be totaly transparent at 42% of the length between the circle center and its farthest corner.
And in fact we can be more explicit with:
radial-gradient(circle at top left, rgba(35, 216, 219, 0.20) 0%, transparent 42%),
The animation
.typewriter {
position: relative;
display: inline-block;
overflow: hidden;
white-space: nowrap;
width: 0;
max-width: calc(var(--chars) * 1ch);
/* 1ch is the width of character "0" with the current font */
opacity: 1;
color: var(--cyan);
font-size: 64px;
text-shadow:
0 0 12px rgba(35, 216, 219, 0.72),
0 0 32px rgba(35, 216, 219, 0.22);
padding-right: 0.15ch;
animation:
typing 2s steps(var(--chars), jump-end) forwards;
}
.typewriter::after {
content: "";
position: absolute;
right: 0;
top: 0.12em;
width: 1ch;
height: 0.95em;
opacity: 0;
background: var(--cyan);
box-shadow:
0 0 10px rgba(35, 216, 219, 0.85),
0 0 22px rgba(35, 216, 219, 0.32);
animation:
block-blink 2s steps(1, end) forwards;
}
@keyframes typing {
from { width: 0; }
to { width: calc(var(--chars) * 1ch); }
}
@keyframes block-blink {
0%, 15% {
opacity: 0;
}
17%, 33% {
opacity: 1;
}
34%, 50% {
opacity: 0;
}
51%, 66% {
opacity: 1;
}
67%, 83% {
opacity: 0;
}
84%, 100% {
opacity: 1;
}
100% {
opacity: 0;
}
/*
because forwards freezes to the last state of the animation
*/
}
So the browser sees something like that:
<div>
Text
::after
</div>
.typewriter::after is a pseudo-element. And we need it to have content: "", otherwise it might be igonred by the browser.
The main animation is the box extending that starts at width: 1ch to the root variable value --chars: 29;.
This is this animation:
@keyframes typing {
from { width: 0; }
to { width: calc(var(--chars) * 1ch); }
}
Launched by:
animation:
typing 2s steps(var(--chars), jump-end) forwards;
So it lasts 2 seconds and has 29 - var(--chars) checkpoints width, like 1ch -> 2ch -> 3ch and so on to 29ch.
We got the same concept for the cursor blink with:
animation:
block-blink 2s steps(1, end) forwards;
But in fact, here the checkpoint value of opacity is not controled by step() trigering animations, but directly inside the animation where we define more precise checkpoints with percentage values:
@keyframes block-blink {
0%, 15% {
opacity: 0;
}
17%, 33% {
opacity: 1;
}
34%, 50% {
opacity: 0;
}
51%, 66% {
opacity: 1;
}
67%, 83% {
opacity: 0;
}
84%, 100% {
opacity: 1;
}
100% {
opacity: 0;
}
/*
because forwards freezes to the last state of the animation
*/
}
Now the description panel.
<!DOCTYPE html>
<html>
<head>
<meta charset="UTF-8" />
<style>
:root {
--cyan: #23D8DB;
--blue: #2394DB;
--green: #7CFFB2;
--red: #FA8072;
--text: #dffcff;
--muted: rgba(223, 252, 255, 0.55);
--animation: 4s;
}
body {
margin: 0;
background: transparent;
font-family: "JetBrains Mono", "DejaVu Sans Mono", monospace;
color: var(--text);
font-size: 24px;
overflow: hidden;
}
.panel {
position: relative;
width: 720px;
padding: 24px 28px 32px 28px;
border: 1px solid rgba(35, 216, 219, 0.55);
border-radius: 8px;
background:
linear-gradient(
135deg,
rgba(4, 8, 13, 0.96),
rgba(8, 10, 18, 0.92)
);
box-shadow:
0 0 12px rgba(35, 216, 219, 0.16),
inset 0 0 14px rgba(35, 216, 219, 0.04);
overflow: hidden;
animation:
panel-exit 0.45s ease forwards;
animation-delay: var(--animation);
}
.panel::before {
content: "";
position: absolute;
inset: 0;
background:
repeating-linear-gradient(
to bottom,
rgba(255,255,255,0.025) 0px,
rgba(255,255,255,0.025) 1px,
transparent 1px,
transparent 6px
);
pointer-events: none;
opacity: 0.45;
}
.header {
position: relative;
display: flex;
flex-direction: row;
align-items: center;
gap: 10px; /* set gap between direct .header children */
margin-bottom: 18px;
color: var(--cyan);
letter-spacing: 0.04em;
text-transform: lowercase; /* like toLower() function */
text-shadow: 0 0 6px rgba(35, 216, 219, 0.45);
}
.prompt {
color: var(--green);
}
.cursor {
width: 11px;
height: 24px;
background: var(--cyan);
opacity: 1;
animation: blink 0.8s step-end infinite;
}
.boot {
position: relative;
}
.line {
display: grid;
grid-template-columns: 94px 90px 1fr;
column-gap: 10px;
align-items: baseline;
margin: 9px 0; /* vertical space between cell and its content */
line-height: 1.22; /* font-size * 1.22 */
opacity: 0;
animation: bootline 0.12s steps(1, end) forwards;
}
.line:nth-child(1) { animation-delay: 0.18s; }
.line:nth-child(2) { animation-delay: 0.36s; }
.line:nth-child(3) { animation-delay: 0.54s; }
.line:nth-child(4) { animation-delay: 0.72s; }
.line:nth-child(5) { animation-delay: 0.90s; }
.line:nth-child(6) { animation-delay: 1.08s; }
.line:nth-child(7) { animation-delay: 1.26s; }
.line:nth-child(8) { animation-delay: 1.44s; }
.line:nth-child(9) { animation-delay: 1.62s; }
.time {
color: var(--muted);
}
.status {
color: var(--green);
white-space: nowrap;
}
.msg {
color: var(--text);
}
.key {
color: var(--cyan);
}
.comment {
color: var(--red);
}
.final {
margin-top: 16px;
color: var(--cyan);
}
.final .status {
color: var(--blue);
}
.progress {
position: absolute;
left: 28px;
right: 28px;
bottom: 16px;
/*
Place the left edge 28px from the parent’s left edge.
Place the right edge 28px from the parent’s right edge.
*/
height: 4px;
background: rgba(223, 252, 255, 0.12);
overflow: hidden;
}
.progress::before {
content: "";
display: block;
width: 100%; /* 100% of its allowed width in the container it is in */
height: 100%; /* or 4px -> smae as .progress (after animation) */
background: linear-gradient(
90deg,
var(--blue), /* start point */
var(--cyan), /* middle point */
var(--green) /* end point */
);
/* from left to right */
transform-origin: left;
transform: scaleX(1);
animation: progress-empty var(--animation) linear forwards;
}
@keyframes progress-empty {
to {
transform: scaleX(0);
}
}
@keyframes panel-exit {
to {
opacity: 0;
}
}
@keyframes bootline {
to {
opacity: 1;
}
}
@keyframes blink {
50% {
opacity: 0;
}
}
</style>
</head>
<body>
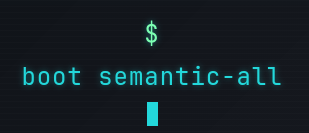
<div class="panel">
<div class="header">
<span class="prompt">$</span>
<span>boot semantic-all</span>
<span class="cursor"></span>
</div>
<div class="boot">
<div class="line">
<span class="time">[0.001]</span>
<span class="status">[ OK ]</span>
<span class="msg">mount <span class="key">/sys/semantics</span></span>
</div>
<div class="line">
<span class="time">[0.142]</span>
<span class="status">[ OK ]</span>
<span class="msg">start <span class="key">low-level.service</span></span>
</div>
<div class="line">
<span class="time">[0.284]</span>
<span class="status">[ OK ]</span>
<span class="msg">load <span class="key">invariants</span>, <span class="key">control</span></span>
</div>
<div class="line">
<span class="time">[0.421]</span>
<span class="status">[ OK ]</span>
<span class="msg">init <span class="key">dataframe.target</span></span>
</div>
<div class="line">
<span class="time">[0.613]</span>
<span class="status">[ OK ]</span>
<span class="msg">compile <span class="key">zero-cost abstractions</span></span>
</div>
<div class="line">
<span class="time">[0.802]</span>
<span class="status">[ OK ]</span>
<span class="msg">start <span class="key">parser-research</span></span>
</div>
<div class="line">
<span class="time">[1.036]</span>
<span class="status">[ OK ]</span>
<span class="msg">stack <span class="key">C++ Haskell LaTeX Bash</span></span>
</div>
<div class="line">
<span class="time">[1.274]</span>
<span class="status">[ OK ]</span>
<span class="msg">sync <span class="key">cost-model.timer</span></span>
</div>
<div class="line final">
<span class="time">[1.777]</span>
<span class="status">READY</span>
<span class="msg"><span class="comment">pay the cost, know why</span></span>
</div>
</div>
<div class="progress"></div>
</div>
</body>
</html>
So first the .panel:
.panel {
position: relative;
width: 720px;
padding: 24px 28px 32px 28px;
border: 1px solid rgba(35, 216, 219, 0.55);
border-radius: 8px;
background:
linear-gradient(
135deg,
rgba(4, 8, 13, 0.96),
rgba(8, 10, 18, 0.92)
);
box-shadow:
0 0 12px rgba(35, 216, 219, 0.16),
inset 0 0 14px rgba(35, 216, 219, 0.04);
overflow: hidden;
animation:
panel-exit 0.45s ease forwards;
animation-delay: var(--animation);
}
First concerning the dimesnion, we provided width but not the height, so its height is determined by the content we put inside the element that inherits from this class plus the top and bottom padding.
Also, a small word on padding syntax.
-
padding x-> means all side -
padding x1 x2->x1= top-bottom |x2= left-right -
padding x1 x2 x3->x1= top |x2= left/right |x3= bottom -
padding x1 x2 x3 x4->x1= top |x2= right |x3= bottom |x4= left
Now, what does overflow: hidden; mean ?
-> All things that are outside the container get cut off
And what about the shadow thing ?
box-shadow:
0 0 12px rgba(35, 216, 219, 0.16),
inset 0 0 14px rgba(35, 216, 219, 0.04);
First, this part:
0 0 12px rgba(35, 216, 219, 0.16),
This will just apply a slight glow of 12px thick from the border to outer space, the color of the glow will be rgba(35, 216, 219, 0.16).
For example:
<div style="box-shadow: 0 0 14px red; width: 55px;">
A
</div>

We got the same concept here:
inset 0 0 14px rgba(35, 216, 219, 0.04);
But inset tells tha the glows will be applied from the border to the inner space of the element.
For example:
<div style="box-shadow: inset 0 0 14px red; width: 55px;">
B
</div>

Then both combined:
<div style="box-shadow: 3px 0 14px red, inset 3px 0 14px red; width: 55px;">
B
</div>

Now, the animation:
animation:
panel-exit 0.45s ease forwards;
animation-delay: var(--animation);
It references this one:
@keyframes panel-exit {
to {
opacity: 0;
}
}
So we said that we want the original opacity to progressively turn 0. (the default opacity value is 1)
We set the duration of the animation to 0.45 seconds.
We tell forward, so the state of the class (.panel in this case), must be the one that is described at the end of the animation, in this case the same .panel but transparent.
But, is the switch from 1 to 0 linear ?
If we had put linear instead of ease it wuld have been.
But, what does ease mean ?
-> accelerate slowly, accelerate in the middle and slow near the end
Now, pseudo-element .panel::first:
.panel::before {
content: "";
position: absolute;
inset: 0;
background:
repeating-linear-gradient(
to bottom,
rgba(255,255,255,0.025) 0px,
rgba(255,255,255,0.025) 1px,
transparent 1px,
transparent 6px
);
pointer-events: none;
opacity: 0.45;
}
inset 0 -> means top: 0; right: 0; top: 0; bottom: 0;.
Meaning that that there is no gap between .panel and this pseudo-element.
So the pseudo-element fills it.
top: 0; /* pseudo-element top edge touches panel top edge */
right: 0; /* pseudo-element right edge touches panel right edge */
bottom: 0; /* pseudo-element bottom edge touches panel bottom edge */
left: 0; /* pseudo-element left edge touches panel left edge */
And look at the shade as background color, yess it's a color pattern from top to bottom.
Where we have the same color rectangle (1px height and has te with of .panel) repeating each 7nth px.
And between those same color rectangle, we have just raw transparency 1px -> 6px.
pointer-event: none; is absolutely unnecessary here because it just tells te browser to make this pseudo element not intercept the mouse-click, so in this case just the .panel element intercepts them.
But in fact because this separation between the class and its pseudo-element is just a way to make the abstraction more explicit, like we are drawing the pseudo-element background on top of the class element background, and we control each of thei setting in term of colors, transparency...
But in fact for this simple use case, we can absolutely merge them:
.panel {
position: relative;
width: 720px;
padding: 24px 28px 32px 28px;
border: 1px solid rgba(35, 216, 219, 0.55);
border-radius: 8px;
background:
repeating-linear-gradient(
to bottom,
rgba(255,255,255,calc(0.025 * 0.45)) 0px,
rgba(255,255,255,calc(0.025 * 0.45)) 1px,
transparent 1px,
transparent 6px
),
linear-gradient(
135deg,
rgba(4, 8, 13, 0.96),
rgba(8, 10, 18, 0.92)
);
box-shadow:
0 0 12px rgba(35, 216, 219, 0.16),
inset 0 0 14px rgba(35, 216, 219, 0.04);
overflow: hidden;
animation:
panel-exit 0.45s ease forwards;
animation-delay: var(--animation);
}
Because the psedo-element transparency was 0.45, so the transparency of the background color is multipied by 0.45.
In not so much modern browsers, maybe that the calc may not be supported, so just precompute them and hardcode the result.
Now .header:
.header {
position: relative;
display: flex;
flex-direction: row;
align-items: center;
gap: 10px;
margin-bottom: 18px; /* begins at 18px under the op of the container which is panel in our case */
color: var(--cyan);
letter-spacing: 0.04em;
text-transform: lowercase; /* like toLower() function */
text-shadow: 0 0 6px rgba(35, 216, 219, 0.45);
}
display: flex; makes .header a flex container and defauts to flex-direction: row;, even tho we made it explicit with flex-direction: row;.
Then, the childrens are placed on the same row by default (it would be the same case if we remove it because spans are inline).
Example from th real file:
<div class="header">
<span class="prompt">$</span>
<span>boot semantic-all</span>
<span class="cursor"></span>
</div>

If we had set flex-direction: column; it would have placed the direct children of .header vertically, one below the other.
Example of what it could have been:
<div class="header">
<span class="prompt">$</span>
<span>boot semantic-all</span>
<span class="cursor"></span>
</div>
And we also control how the aligment is performed with align-items: center;
Because we are in the flex-direction: row; the aligent is performed on the y axis -> the center of each element is located onto the same horizontal line.
It would have been the opposite if we had set flex-direction: column;.
gap: 10px; tells to put a 10px gap betwen the direct elements of a container.
Now, the .cursor.
.cursor {
width: 11px;
height: 24px;
background: var(--cyan);
opacity: 1;
animation: blink 0.8s step-end infinite;
}
And its animation is described here:
@keyframes blink {
50% {
opacity: 0;
}
}
In there:
animation: blink 0.8s step-end infinite;
step-end is a shortcut for step(1, end)
Or in newer wording step(1, jump-end).
The animation is looped forever with infinite.
0% -> 50% opacity stays 1
50% jumps to 0
50% -> 100% opacity stays 0
100% jumps back to 1
And because the animation is 0.8s long, the cursor is visible for 0.8 * 0.5 = 0.4s and dispear also for 0.4s.
Each loop returns to the same state as before the animation began, then runs again.
Then the .line.
.line {
display: grid;
grid-template-columns: 94px 90px 1fr;
column-gap: 10px;
align-items: baseline;
margin: 9px 0; /* vertical bottom and top space between cell and its content */
line-height: 1.22; /* font-size * 1.22 */
opacity: 0;
animation: bootline 0.12s steps(1, end) forwards;
}
Here wat defines how the direct childrens of the container wil be displayed is:
display: grid;
grid-template-columns: 94px 90px 1fr;
It will basically do like display: flex; with flex-direction: row;.
But here you have direct tighter control over the length of each column / cell with grid-template.
Here we have:
| 94px | gap 10px | 72px | gap 10px | 1fr |
fr means fraction of remaining space.
Example:
grid-template-columns: 1fr 2fr;
Example:
<div style="display: grid; grid-template-columns: 1fr 2fr; width: 300px; border: 2px solid red">
<span style="border: 2px solid red;"> A</span>
<span style="border: 2px solid red;"> B</span>
</div>

Creates just 2 cols with the first having 1 tier of the width space and the second the 2 tier.
Now, something that is quite subtle align-items: baseline;.
For each grid cell inside one .line, the browser looks at the text baseline of each item.
And aligns the grid items according to their text baseline.
Text1 Text2
------ <- baseline here ------ <- baseline here
Not their container that may vary (not the case here btw).
But if each element had a different class with different properties in terms of dimensions, that could happen if we had not set align-items: baseline;:
|--------| |--------|
| Text1 | | |
| | <- baseline here | Text2 |
|--------| |--------| <- baseline here
And now on the animation:
animation: bootline 0.12s steps(1, end) forwards;
Because we want the line to appear in one jump, we used steps(1, end) -> only one jump to the end of the animation state -> opacity = 1.
The animation is described here:
@keyframes bootline {
to {
opacity: 1;
}
}
But how do we delay the animations of each bootline to mimic a Linux startup ?
With this:
.line:nth-child(1) { animation-delay: 0.18s; }
.line:nth-child(2) { animation-delay: 0.36s; }
.line:nth-child(3) { animation-delay: 0.54s; }
.line:nth-child(4) { animation-delay: 0.72s; }
.line:nth-child(5) { animation-delay: 0.90s; }
.line:nth-child(6) { animation-delay: 1.08s; }
.line:nth-child(7) { animation-delay: 1.26s; }
.line:nth-child(8) { animation-delay: 1.44s; }
.line:nth-child(9) { animation-delay: 1.62s; }
.line:nth-child(N) targets the line object that inherited from the class object that is at the Nth position of its parent.
So with:
<div class="boot">
<h2>Boot log</h2>
<div class="line">line 1</div>
<div class="line">line 2</div>
</div>
.line:nth-child(1) matches nothing because the first child is not a .line.
If we had:
<div class="boot">
<h2>Boot log</h2>
<div class="line">line 1</div>
<div class="line">line 2</div>
</div>
<div class="boot">
<h2>Boot log</h2>
<div class="line">line 1</div>
<div class="line">line 2</div>
</div>
.line:nth-child(2) would match one .line inside each repeated block, because the nth-child is evaluated relative to each parent independently.
Now, the combination of class properties.
.final .status {
color: var(--blue);
}
We can overwrite the properties of a class telling that whe this class is intricated with class X, then we redefine some or all of its properties.
This class combination is met at this line:
<div class="line final">
<span class="time">[1.777]</span>
<span class="status">READY</span>
<span class="msg"><span class="comment">pay the cost, know why</span></span>
</div>
Now, the .progress bar indicatin when the .panel object and its childrens are gonna disappear (because of its opacity being 0).
.progress {
position: absolute;
left: 28px;
right: 28px;
bottom: 16px;
height: 4px;
background: rgba(223, 252, 255, 0.12);
overflow: hidden;
}
.progress::before {
content: "";
display: block;
width: 100%; /* 100% of its allowed width within its container */
height: 100%; /* or 4px -> same as .progress (after animation) */
background: linear-gradient(
90deg,
var(--blue), /* start point */
var(--cyan), /* middle point */
var(--green) /* end point */
);
/* from left to right */
transform-origin: left;
transform: scaleX(1);
animation: progress-empty var(--animation) linear forwards;
}
@keyframes progress-empty {
to {
transform: scaleX(0);
}
}
So technicaly we got:
<div class="progress">
<pseudo-element>
</div>
Even if in HTML cod we just write:
<div class="progress"></div>
We did that to add the track of the progress bar being the background color of .progress.
Because at the beginning we have the pseudo-element that fills the entirety of the .progress object (width: 100%; height: 100%;), and when the animation instantly begins, we have the pseudo-element width shrinking toward 0 with scaleX(0).
But now the question is where does live the origin of the pseudo-element ?
Because the width shrinking toward 0 can be to the left or to the right.
It is why we precise its origin being left in this case with transform-origin: left;.
Now, for the date.
<!DOCTYPE html>
<html>
<head>
<meta charset="UTF-8" />
<style>
:root {
--cyan: #23D8DB;
--blue: #2394DB;
--green: #7CFFB2;
--text: #dffcff;
--bg: rgba(4, 8, 13, 0.92);
}
body {
margin: 0;
background: transparent;
font-family: "JetBrains Mono", "DejaVu Sans Mono", monospace;
overflow: hidden;
}
.terminal {
display: inline-block;
padding: 16px 20px;
border: 1px solid rgba(35, 216, 219, 0.45);
border-radius: 10px;
background:
linear-gradient(135deg,
rgba(4, 8, 13, 0.96),
rgba(8, 12, 20, 0.90));
box-shadow:
0 0 18px rgba(35, 216, 219, 0.14),
inset 0 0 14px rgba(35, 216, 219, 0.04);
color: var(--text);
font-size: 34px;
white-space: nowrap; /* Keep everything on one single line. */
}
.prompt {
color: var(--green);
}
.command {
color: var(--cyan);
}
.output {
color: var(--text);
margin-top: 8px;
}
</style>
</head>
<body>
<div class="terminal">
<div><span class="prompt">$</span> <span class="command">date</span></div>
<div class="output" id="date-output"></div>
</div>
<script>
function pad2(n) {
return String(n).padStart(2, "0");
}
function formatDateLikeBash(d) {
const weekdays = ["Sun", "Mon", "Tue", "Wed", "Thu", "Fri", "Sat"];
const months = ["Jan", "Feb", "Mar", "Apr", "May", "Jun",
"Jul", "Aug", "Sep", "Oct", "Nov", "Dec"];
const weekday = weekdays[d.getDay()];
const month = months[d.getMonth()];
const day = String(d.getDate()).padStart(2, " ");
const time =
pad2(d.getHours()) + ":" +
pad2(d.getMinutes()) + ":" +
pad2(d.getSeconds());
const tz = Intl.DateTimeFormat("en-US", {
timeZoneName: "short"
}).formatToParts(d).find(p => p.type === "timeZoneName")?.value || "";
const year = d.getFullYear();
return `${weekday} ${month} ${day} ${time} ${tz} ${year}`;
}
function updateDate() {
document.getElementById("date-output").textContent =
formatDateLikeBash(new Date());
}
updateDate(); /* run once immediately */
setInterval(updateDate, 1000); /* run every 1k ms => 1s */
</script>
</body>
</html>
Intl is a JavaScript’s built-in library.
It contains tools for formatting things according to languages - locales:
Intl.DateTimeFormat
Intl.NumberFormat
Intl.Collator
Intl.RelativeTimeFormat
So Intl.DateTimeFormat is used to format dates - times in a locale-aware way.
Intl.DateTimeFormat("en-US", {
timeZoneName: "short"
})
Means:
Create a formatter using English/US formatting rules and include the timezone name in short form.
The second argument is an object, like a dictionary/config:
{
timeZoneName: "short"
}
Then,
Intl.DateTimeFormat("en-US", {
timeZoneName: "short"
}).format(new Date())
Outputs something like:
5/19/2026, GMT+2
or:
5/19/2026, CEST
Instead of returning one big string, formatToParts(d) returns an array of small objects.
For example:
const parts = Intl.DateTimeFormat("en-US", {
timeZoneName: "short"
}).formatToParts(new Date());
Might produce something like:
[
{ type: "month", value: "5" },
{ type: "literal", value: "/" },
{ type: "day", value: "19" },
{ type: "literal", value: "/" },
{ type: "year", value: "2026" },
{ type: "literal", value: ", " },
{ type: "timeZoneName", value: "GMT+2" }
]
A literal object is the current separator between 2 tile units.
So, in this case, if we use format that returns the date as a string instead as an array of objects:
5/19/2026, GMT+2
5 and not 05 as month because "en-US" format does that, if we want to keep 2 digits we make it explicit:
new Intl.DateTimeFormat("en-US", {
month: "2-digit",
day: "2-digit",
year: "numeric",
timeZoneName: "short"
}).format(new Date());
Then:
05/19/2026, GMT+2
But we won't use that in this case because it would require to grep substring of the date string which can be very messy fast => string length changes over time.
Also, in this case we use this Intl.formatToParts() just to get the timeZoneName, so we must directly filter for the intended object.
That's why we use attach the .find(p => p.type == "timeZoneName")?.value || "".
So if it finds it, it just output its value, if no it outputs "".
Also, for formattingtime units that can be 1 or 2 digits long, we use this functions:
function pad2(n) {
return String(n).padStart(2, "0");
}
If the character is less than 2, then it just prepends "0".
And finally my intro:
<!doctype html>
<html lang="fr">
<head>
<meta charset="utf-8" />
<title>Control Room Intro</title>
<style>
:root {
--start-logo: -140px;
--end-logo: 620px;
--animation-duration: 0.7s;
}
body {
margin: 0;
height: 100vh;
display: grid;
place-items: center;
overflow: hidden;
height: 1080;
width: 1920;
background:
radial-gradient(circle at center, rgba(255, 255, 255, 0.10), transparent 35%),
linear-gradient(90deg, rgba(7, 17, 31, 0.92), rgba(18, 65, 115, 0.72)),
rgba(0, 0, 0, 0.25);
}
.intro {
position: relative;
width: 740px;
height: 220px;
display: flex;
align-items: center;
padding: 0 40px;
background: rgba(255, 255, 255, 0.08);
border: 1px solid rgba(255, 255, 255, 0.18);
border-radius: 28px;
box-shadow: 0 30px 90px rgba(0, 0, 0, 0.35);
backdrop-filter: blur(60px);
}
.text {
font-family: "JetBrains Mono", "DejaVu Sans Mono", monospace;
font-size: 86px;
font-weight: 800;
letter-spacing: -2px;
color: white;
text-shadow: 0 12px 35px rgba(0, 0, 0, 0.55);
clip-path: inset(0 100% 0 0);
animation: reveal-text var(--animation-duration) ease-out forwards;
}
.logo {
position: absolute;
width: 120px;
height: 120px;
object-fit: contain;
transform: translateX(var(--start-logo));
animation: move-logo var(--animation-duration) ease-out forwards;
z-index: 2;
border-radius: 50%;
box-shadow:
drop-shadow(0 0 18px rgba(255, 255, 255, 0.35))
drop-shadow(0 16px 28px rgba(0, 0, 0, 0.45));
}
.logo-glow {
position: absolute;
width: 120px;
height: 150px;
border-radius: 50%;
background: rgba(255, 255, 255, 0.22);
filter: blur(24px);
transform: translateX(var(--start-logo));
animation: move-glow var(--animation-duration) ease-out forwards;
z-index: 1;
}
@keyframes move-logo {
from {
transform: translateX(var(--start-logo));
}
to {
transform: translateX(var(--end-logo));
}
}
@keyframes move-glow {
from {
transform: translateX(var(--start-logo));
}
to {
transform: translateX(var(--end-logo));
}
}
@keyframes reveal-text {
from {
clip-path: inset(0 100% 0 0);
}
to {
clip-path: inset(0 0 0 0);
}
}
</style>
</head>
<body>
<div class="intro">
<div class="logo-glow"></div>
<img class="logo" src="logo2.png" alt="Logo">
<div class="text">Control Room</div>
</div>
</body>
</html>
There are quite new CSS properties here:
First in the Intro:
.intro {
position: relative;
width: 740px;
height: 220px;
display: flex;
align-items: center;
padding: 0 40px;
background: rgba(255, 255, 255, 0.08);
border: 1px solid rgba(255, 255, 255, 0.18);
border-radius: 28px;
box-shadow: 0 30px 90px rgba(0, 0, 0, 0.35);
backdrop-filter: blur(60px);
}
And then used as:
<div class="intro">
<div class="logo-glow"></div>
<img class="logo" src="logo2.png" alt="Logo">
<div class="text">Control Room</div>
</div>
The backdrop-filter is a propery that only applies to the element behind the current element, in this case the background but only in the element area it is called from, this is why it perfectly respects the .intro dimensions.
We apply a blur to it.
At first i thought it meant to take a 10px * 10px pixel square, compute the mean of the color value inside that square and apply this color to evry pixel inside that square.
But in fact no, we have the intuition that the blur would be much more like a mosaic.
Conceptually, the browser does something close to this:
For each output pixel, it looks at neighboring pixels around it and computes a weighted mix.
More precisely the neighboors pixel are chosen in a circle with radius you precise, in this case 10px.
But here the blur is not uniform but gaussian.
Meaning that in the area of the .intro element, the farther pixel from its center matters less than the center pixels.
Now, the .body:
body {
margin: 0;
height: 100vh;
display: grid;
place-items: center;
overflow: hidden;
height: 1080;
width: 1920;
background:
radial-gradient(circle at center, rgba(255, 255, 255, 0.10), transparent 35%),
linear-gradient(90deg, rgba(7, 17, 31, 0.92), rgba(18, 65, 115, 0.72)),
rgba(0, 0, 0, 0.25);
}
Basicaly the display: grid; in the case where .body has only one children (a .intro element), then the .body can be viewed as one big grid cell and the .intro element is centered because of place-items: center;.
We also encounter new concepts in .text:
.text {
font-family: "JetBrains Mono", "DejaVu Sans Mono", monospace;
font-size: 86px;
font-weight: 800;
letter-spacing: -2px;
color: white;
text-shadow: 0 12px 35px rgba(0, 0, 0, 0.55);
clip-path: inset(0 100% 0 0);
animation: reveal-text 2s ease-out forwards;
}
clip-path defines the visible area from the element.
Here it is defined as a rectangle indet(top-clip right-clip bottom-clip left-clip) (padding argument like order).
So here the initial element has no visible region, because all is clipped from the right.
That is only when we start the animation reveal-text, that it will become progressively visible.
The animation:
@keyframes reveal-text {
from {
clip-path: inset(0 100% 0 0);
}
to {
clip-path: inset(0 0 0 0);
}
}
And now for the .logo:
.logo {
position: absolute;
width: 120px;
height: 120px;
object-fit: contain;
transform: translateX(var(--start-logo));
animation: move-logo 2s ease-out forwards;
z-index: 2;
border-radius: 50%;
box-shadow:
drop-shadow(0 0 18px rgba(255, 255, 255, 0.35))
drop-shadow(0 16px 28px rgba(0, 0, 0, 0.45));
}
Here, the object-fit: contain; if for <img> tag.
Meaning it must keep the initial image ratio and resize it (if the container dimensions are not exactly the image dimensions) WITHOUT cropping the image.
Note that the initial position relative to its parent if of course top: 0; right: 0; bottom: 0; left: 0;, but we apply a X translation by --start-logo = -140px, so it visually starts at top: 0; right: -140px; bottom: 0; left: 0;.
And the animation:
@keyframes move-logo {
from {
transform: translateX(var(--start-logo));
}
to {
transform: translateX(var(--end-logo));
}
}
Will move from left to right --end-logo = 620px the image.
We use ease-out -> animation starts fast and slow near the end.
And we go furher, we add a glow to the logo with a light opacity white rgba(255, 255, 255, 0.22).
.logo-glow {
position: absolute;
width: 120px;
height: 150px;
border-radius: 50%;
background: rgba(255, 255, 255, 0.22);
filter: blur(24px);
transform: translateX(var(--start-logo));
animation: move-glow 2s ease-out forwards;
z-index: 1;
}
And same animation values:
@keyframes move-glow {
from {
transform: translateX(var(--start-logo));
}
to {
transform: translateX(var(--end-logo));
}
}
But wait is the glow behind or above the logo ?
That's where z-index comes.
Here, because the z-index of the logo is 2, which is higher than the z-index of the glow (1), so the .logo element is painted above the glow.
How do i automate my OBS records ?
First, OBS has a websocket protocol.
So in veeeery brief:
Classic HTTP is mostly:
client asks → server answers
client asks → server answers
client asks → server answers
WebSocket is more like:
client connects once
connection stays open
client can send messages anytime
server can send messages anytime
But for us it means that we can make a program that sends certain requests to OBS.
Also this is good to keep in mind that we can view OBS as a state machine.
So what can we do ?
Launch the record
First i have just created a virtual env as:
> mkdir -p .local/venvs
> python3 -m venv .local/bin/venvs/obsws
Then ensured i had .local/bin
> mkdir -p .local/bin
And installed the Python3 package for the OBS websocket protocol API -> obsws-python.
pip install obsws-python
Also, i want to get notified when i do an action, so i must install notify-send.
> sudo apt install libnotify-bin
Now we are ready:
> touch .local/bin/obs-record-start
And we launch the record with the .start_record() method:
#!/home/juju/.local/venvs/obsws/bin/python
import subprocess
import sys
from obsws_python import ReqClient
PASSWORD = "password"
try:
cl = ReqClient(
host="localhost",
port=4455,
password=PASSWORD
)
status = cl.get_record_status()
if status.output_active:
subprocess.run([
"notify-send",
"-t", "1000",
"-u", "low",
"-a", "OBS",
"OBS recording",
"Recording is already running"
])
sys.exit(0)
cl.start_record()
subprocess.run([
"notify-send",
"-t", "1000",
"-u", "normal",
"-a", "OBS",
"OBS recording started",
"Recording successfully begun"
])
except Exception as e:
subprocess.run([
"notify-send",
"-t", "1000",
"-u", "critical",
"-a", "OBS",
"OBS recording failed",
str(e)
])
sys.exit(1)
I just have to make it executable before linking it to a keyboard shortcut.
> chmod +x .local/bin/obs-record-start
Annd because i use I3 window manager, i can just edit my conf at .config/i3/config and add:
bindsym $mod+Shift+r exec ~/.local/bin/obs-record-start
To bind a keyboard combination shortcut to the execution of this program.
Stop it
That is kinda the same thing, the code is just:
#!/home/juju/.local/venvs/obsws/bin/python
import subprocess
import sys
from obsws_python import ReqClient
PASSWORD = "password"
try:
cl = ReqClient(
host="localhost",
port=4455,
password=PASSWORD
)
status = cl.get_record_status()
if not status.output_active:
subprocess.run([
"notify-send",
"-t", "1000",
"-u", "low",
"-a", "OBS",
"OBS recording",
"Recording is not running"
])
sys.exit(0)
result = cl.stop_record()
output_path = getattr(result, "output_path", None)
if output_path:
message = f"Recording saved:\n{output_path}"
else:
message = "Recording stopped and saved"
subprocess.run([
"notify-send",
"-t", "1000",
"-u", "normal",
"-a", "OBS",
"OBS recording saved",
message
])
except Exception as e:
subprocess.run([
"notify-send",
"-t", "1000",
"-u", "critical",
"-a", "OBS",
"OBS stop failed",
str(e)
])
sys.exit(1)
Pause
Same, here is the code:
#!/home/juju/.local/venvs/obsws/bin/python
import sys
import subprocess
from obsws_python import ReqClient
try:
cl = ReqClient(
host="localhost",
port=4455,
password="password"
)
cl.pause_record()
subprocess.run([
"notify-send",
"-t", "1000",
"-u", "normal",
"-a", "OBS",
"Paused Record",
"Recording paused"
])
except Exception as e:
subprocess.run([
"notify-send",
"-t", "1000",
"-u", "critical",
"-a", "OBS",
"OBS recording pause failed",
str(e)
])
sys.exit(1)
Resume
#!/home/juju/.local/venvs/obsws/bin/python
import sys
import subprocess
from obsws_python import ReqClient
try:
cl = ReqClient(
host="localhost",
port=4455,
password="password"
)
cl.resume_record()
subprocess.run([
"notify-send",
"-t", "1000",
"-u", "normal",
"-a", "OBS",
"Resumed Record",
"Recording resumed"
])
except Exception as e:
subprocess.run([
"notify-send",
"-t", "1000",
"-u", "critical",
"-a", "OBS",
"OBS recording resume failed",
str(e)
])
sys.exit(1)
Changing scenes
#!/home/juju/.local/venvs/obsws/bin/python
import sys
import subprocess
from obsws_python import ReqClient
if len(sys.argv) < 2:
print("Usage: obs-scene 'Scene name'")
sys.exit(1)
scene_name = sys.argv[1]
try:
cl = ReqClient(
host="localhost",
port=4455,
password="password"
)
cl.set_current_program_scene(scene_name)
subprocess.run([
"notify-send",
"-t", "1000",
"-u", "normal",
"-a", "OBS",
f"{scene_name}",
"Changing scenes"
])
except Exception as e:
subprocess.run([
"notify-send",
"-t", "1000",
"-u", "critical",
"-a", "OBS",
"OBS recording failed",
str(e)
])
sys.exit(1)
And then here are the keyboard shortcuts defined in my I3 configuration:
bindsym $mod+F1 exec ~/.local/bin/obs-scene "Scène"
bindsym $mod+F2 exec ~/.local/bin/obs-scene "Webcam"
bindsym $mod+F3 exec ~/.local/bin/obs-scene "Intro"
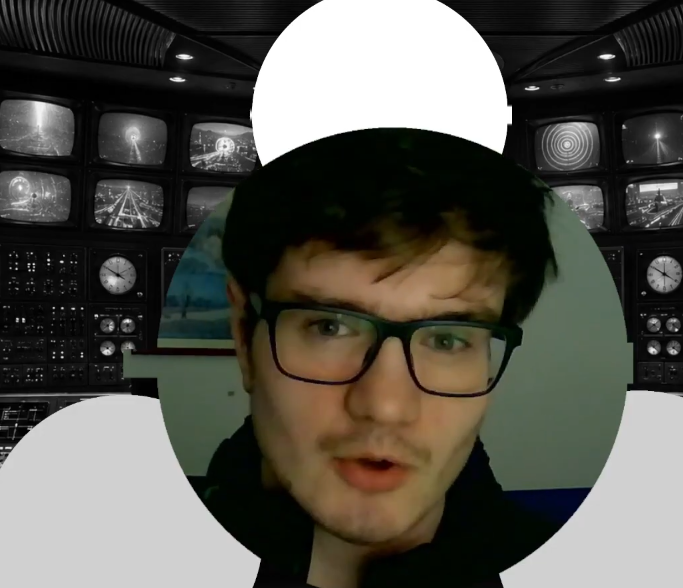
DROIDCAM
Ok, so at first i bought a webcam, on paper it was a good one.
❯ v4l2-ctl --list-devices
NexiGo N60 FHD Webcam Audio: Ne (usb-0000:0a:00.3-1):
/dev/video0
/dev/video1
/dev/media0
-
maximum resolution -> 1920×1080 Full HD at 30 FPS
-
FOV -> 110° diagonal
-
FOV detailled -> D=107° / H=89° / V=48°
-
Video Format-> YUY2 / MJPG
-
Low light correction -> Yes
-
Inclinaison 30°
-
Rotation 360°
-
Ouverture -> f/2.4
-
Focale -> 3.92 mm
-
Linux Compatibility -> USB plug-and-play -> OK
But look at that crappy default image:
Post stream treatment on OBS did not really improoved.
I had to directly talk to the camera with v4l2-ctl.
Its chain is roughly:
v4l2-ctl
↓
Linux V4L2 API
↓
kernel webcam driver, usually uvcvideo for USB webcams
↓
USB/UVC control requests
↓
camera firmware / internal controller
And we can for example control the temperature with:
> v4l2-ctl -d /dev/video0 --set-ctrl=white_balance_temperature=3450
For some cameras, temperature means:
"Assume the scene is lit by a light source of this color temperature, then compensate the image so white objects look white."
And you can see current values and defaults one with:
❯ v4l2-ctl -d /dev/video0 --list-ctrls
User Controls
brightness 0x00980900 (int) : min=0 max=255 step=1 default=128 value=135 flags=0x00001000
contrast 0x00980901 (int) : min=0 max=255 step=1 default=128 value=128 flags=0x00001000
saturation 0x00980902 (int) : min=0 max=255 step=1 default=128 value=128 flags=0x00001000
white_balance_automatic 0x0098090c (bool) : default=1 value=0
gain 0x00980913 (int) : min=0 max=100 step=1 default=5 value=5 flags=0x00001000
power_line_frequency 0x00980918 (menu) : min=0 max=2 default=1 value=1 (50 Hz)
white_balance_temperature 0x0098091a (int) : min=2600 max=6500 step=1 default=4650 value=3450 flags=0x00001000
sharpness 0x0098091b (int) : min=0 max=255 step=1 default=128 value=128 flags=0x00001000
Camera Controls
auto_exposure 0x009a0901 (menu) : min=0 max=3 default=0 value=3 (Aperture Priority Mode)
exposure_time_absolute 0x009a0902 (int) : min=0 max=6500 step=1 default=100 value=100 flags=inactive, 0x00001000
pan_absolute 0x009a0908 (int) : min=-36000 max=36000 step=3600 default=0 value=0 flags=0x00001000
tilt_absolute 0x009a0909 (int) : min=-36000 max=36000 step=3600 default=0 value=0 flags=0x00001000
focus_automatic_continuous 0x009a090c (bool) : default=0 value=0
zoom_absolute 0x009a090d (int) : min=10 max=20 step=1 default=10 value=10 flags=0x00001000
Playing a bit with improved a little bit.
But stillnowhere near a good enough quality imo.
So i switched to using my camera-phone (Iphone 12 mini).
So i've just installed droidcam app on the appstore.
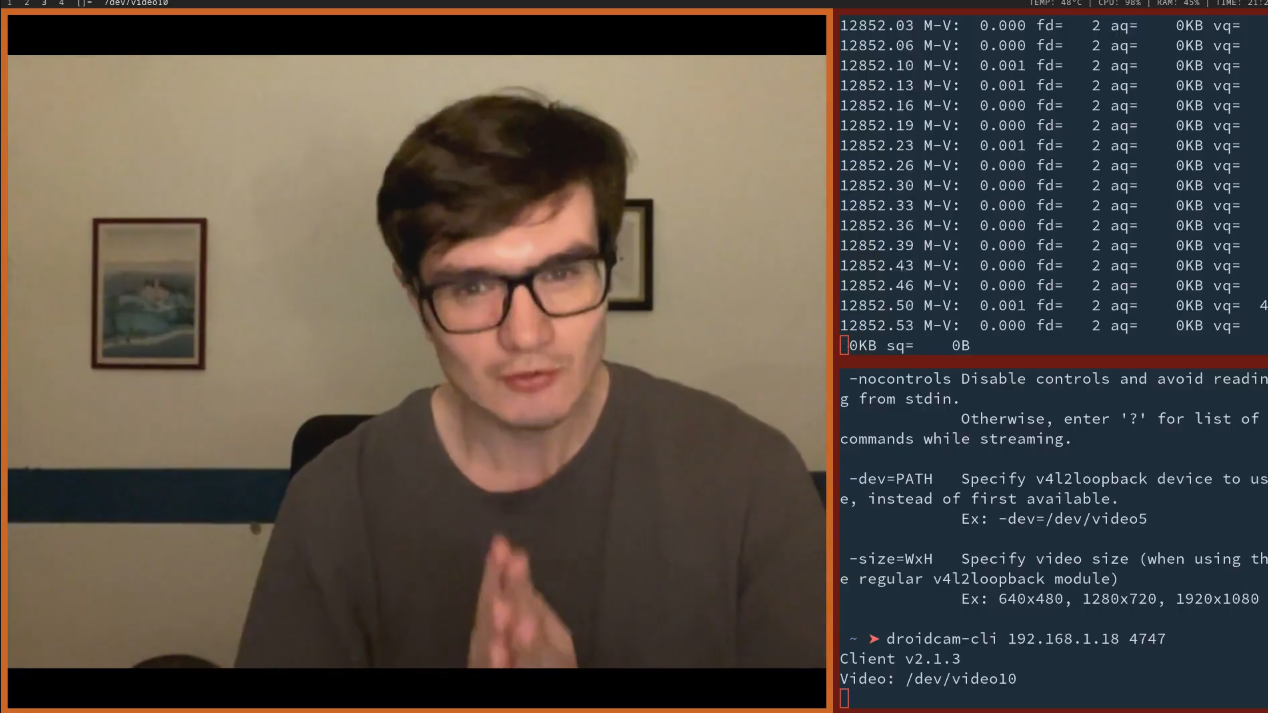
And installed the CLI on my computer:
> wget -O /tmp/droidcam_client_amd64.deb https://droidcam.app/go/droidCam.client.setup.deb
> sudo apt install -f /tmp/droidcam_client_amd64.deb
Now the commands depends on the version.
> droidcam-cli --help
But normaly it is just:
> droidcam-cli -v IP_OF_PHONE_IN_LOCAL_NETWORK PORT
-v-> video
If you want:
-a-> audio
And the ip and port are displayed on the droidcam app.
Note that to connect, you have to launch your droidcam app on your phone.
And, now much nicer quality.
Script that up
Of course we can make it a script and bind it.
#!/usr/bin/env bash
IP="192.168.1.18"
PORT="4747"
notify-send "Starting DroidCam" "IP: $IP PORT: $PORT" -t 1000 -u normal
droidcam-cli -v "$IP" "$PORT"
Because we can only get if the droidcam-cli command has succeded when it stopes being used, then we preventvely send a success message.
Same for stopping it:
#!/usr/bin/env bash
IP="192.168.1.18"
PORT="4747"
killall droidcam-cli
notify-send "Stopping DroidCam" "IP: $IP PORT: $PORT" -t 1000 -u normal
Conclusion
FFmpeg is powerfull but not adapted to make videos, we have to separate the scenes dashboard contro and out actual work space.
We can go very far with OBS, especially add custom animations with HTML CSS accuracy and control.
We can simplify our lives with keyboard shortcut launching scripts that changes the state of OBS in the background.
Our phone has an excellent camera, so use it instead of tweaking firmware parameters over a USB Camera.